 The best place to grow cannabis is indoors.
You have complete control over everything when growing weed indoors, which allows you to really maximize rapid growth and huge yields with incredible potency.
But to get the perfect buds, you need the perfect environment.
The good news is: even if you make mistakes and don’t provide the perfect environment, you will still be harvesting buds. Marijuana is very resilient.
That said, the more things you get right, the better the result.
If you follow the instructions here, you will get all the basics right, while still keeping everything as simple as possible. To me, this is the best balance between great results and not over-complicating things to the point where it becomes stressful and no fun.
So let’s get started, by going through the whole growing process step by step, beginning with the preparation and ending with harvest.
Contents
Indoor Marijuana Growing
1. Find A Grow Space
The first thing you need to do is figure out where you will grow your cannabis plants. Are you setting up in the basement, in a closet, etc?
Once you have the space, you want to get it ready for growing marijuana indoors. The easiest way to do this is to get a grow tent. You can find tons of inexpensive tents on Amazon and the better ones of these cheap tents (like Vivosun) are good enough for most of us.
Check them out here and just pick one that fits into your grow space and has enough room inside to fit your planned number of plants. If you need especially small grow tents, those can be a bit harder to find. Our article on mini grow tents will help.
2. Get Pots And Soil
Sure, you can grow hydroponically or in a soilless growing medium without using hydroponics, but in my quest to keep it simple, I recommend growing indoors with soil. It’s easy to find and easy to use.
Any good quality potting soil will work, but avoid anything with artificial extended release fertilizer or that otherwise contains chemicals. Miracle Gro is a good example of a soil to avoid.
The Ocean Forest Potting Soil from Fox Farm is a great option.
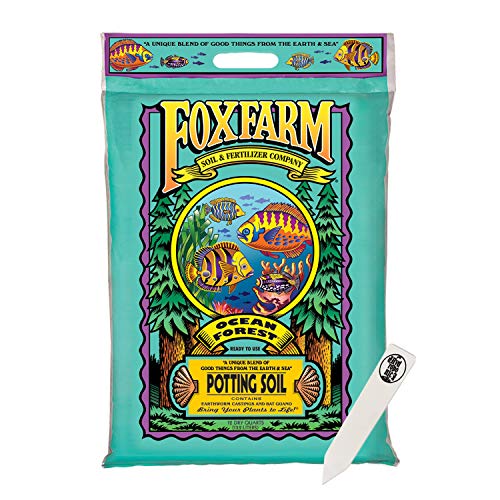
It contains a lot of nutrients, so you won’t need to any any for the first week or so. If you keep re-potting the cannabis plant, you may never have to add any.
If you start your seedlings in this soil (which I do recommend for simplicity), they will suffer some nutrient burn at first. This is not a huge deal, but you can avoid it if you like, by putting some less nutrient-rich soil on top of the Ocean Forest soil for your seedlings.
When it comes to pots, I recommend the fabric variety. They are by far the best option for growing cannabis. These pots from Vivosun are great.
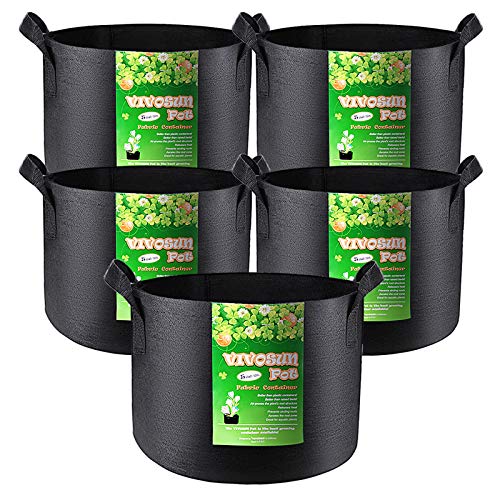
If you want to use pots you already have, that works fine, too. Just make sure whatever container you use has some holes in the bottom for drainage. If you use a regular bucket, for example, make sure to drill a few holes in the bottom.
When it comes to pot sizes, you’ll want a small pot (1 gallon or less) for seedlings, but you can also just use a plastic cup. After that, you want to transplant the plants into ever larger pots.
Once their roots have expanded throughout their new pot, it’s time to give them a larger one so they have room for growth. An easy way to tell they are ready to move is when the roots start coming out the drainage holes in the bottom of the pot.
At some point, you want to stop giving them larger pots, to keep them from growing ever larger. A good rule of thumb for the largest pot size is this: you need about 2 gallons of container per 12″ in plant height.
Thus, if you want your plants to reach a height of 3 feet, you would need a 6 gallon pot. If you are using fabric pots (as I recommend) go twice as big. In this example, get a 12 gallon pot (or at least 10).
The reason fabric pots should be bigger is that the soil dries out much faster in a smart pot. Making the pot larger, increases the time it takes for the soil in the middle to dry out.
4. Add A Grow Light
There are ton of options for grow lights, but we’re keeping it simple. Just get an LED grow light. They cost less to operate and they’re easier to use. Nowadays, they actually cost the same or less than an equivalent HID system, once you account for all the equipment you need to run HID grow lights.
I highly recommend these Spider Farmer lights. They are the best value lights on the market right now and work great for growing cannabis plants.
If you prefer to buy lights made in America, Horticulture Lighting Group is easily the best choice. Most American brands are extremely overpriced (despite most of them manufacturing in China anyway), but HLG is much cheaper and they actually manufacture in Tennessee.
If you are looking to save as much as possible, and you don’t mind spending a bit of extra time and effort, buying direct from a Chinese manufacturer on Alibaba is the way to go.
I have an article on how to buy grow lights on Alibaba. It covers everything you need to know, including how to vet suppliers to ensure you do not get scammed. It also includes the two most reputable LED grow light manufacturers. With them, you know you will get what you order.
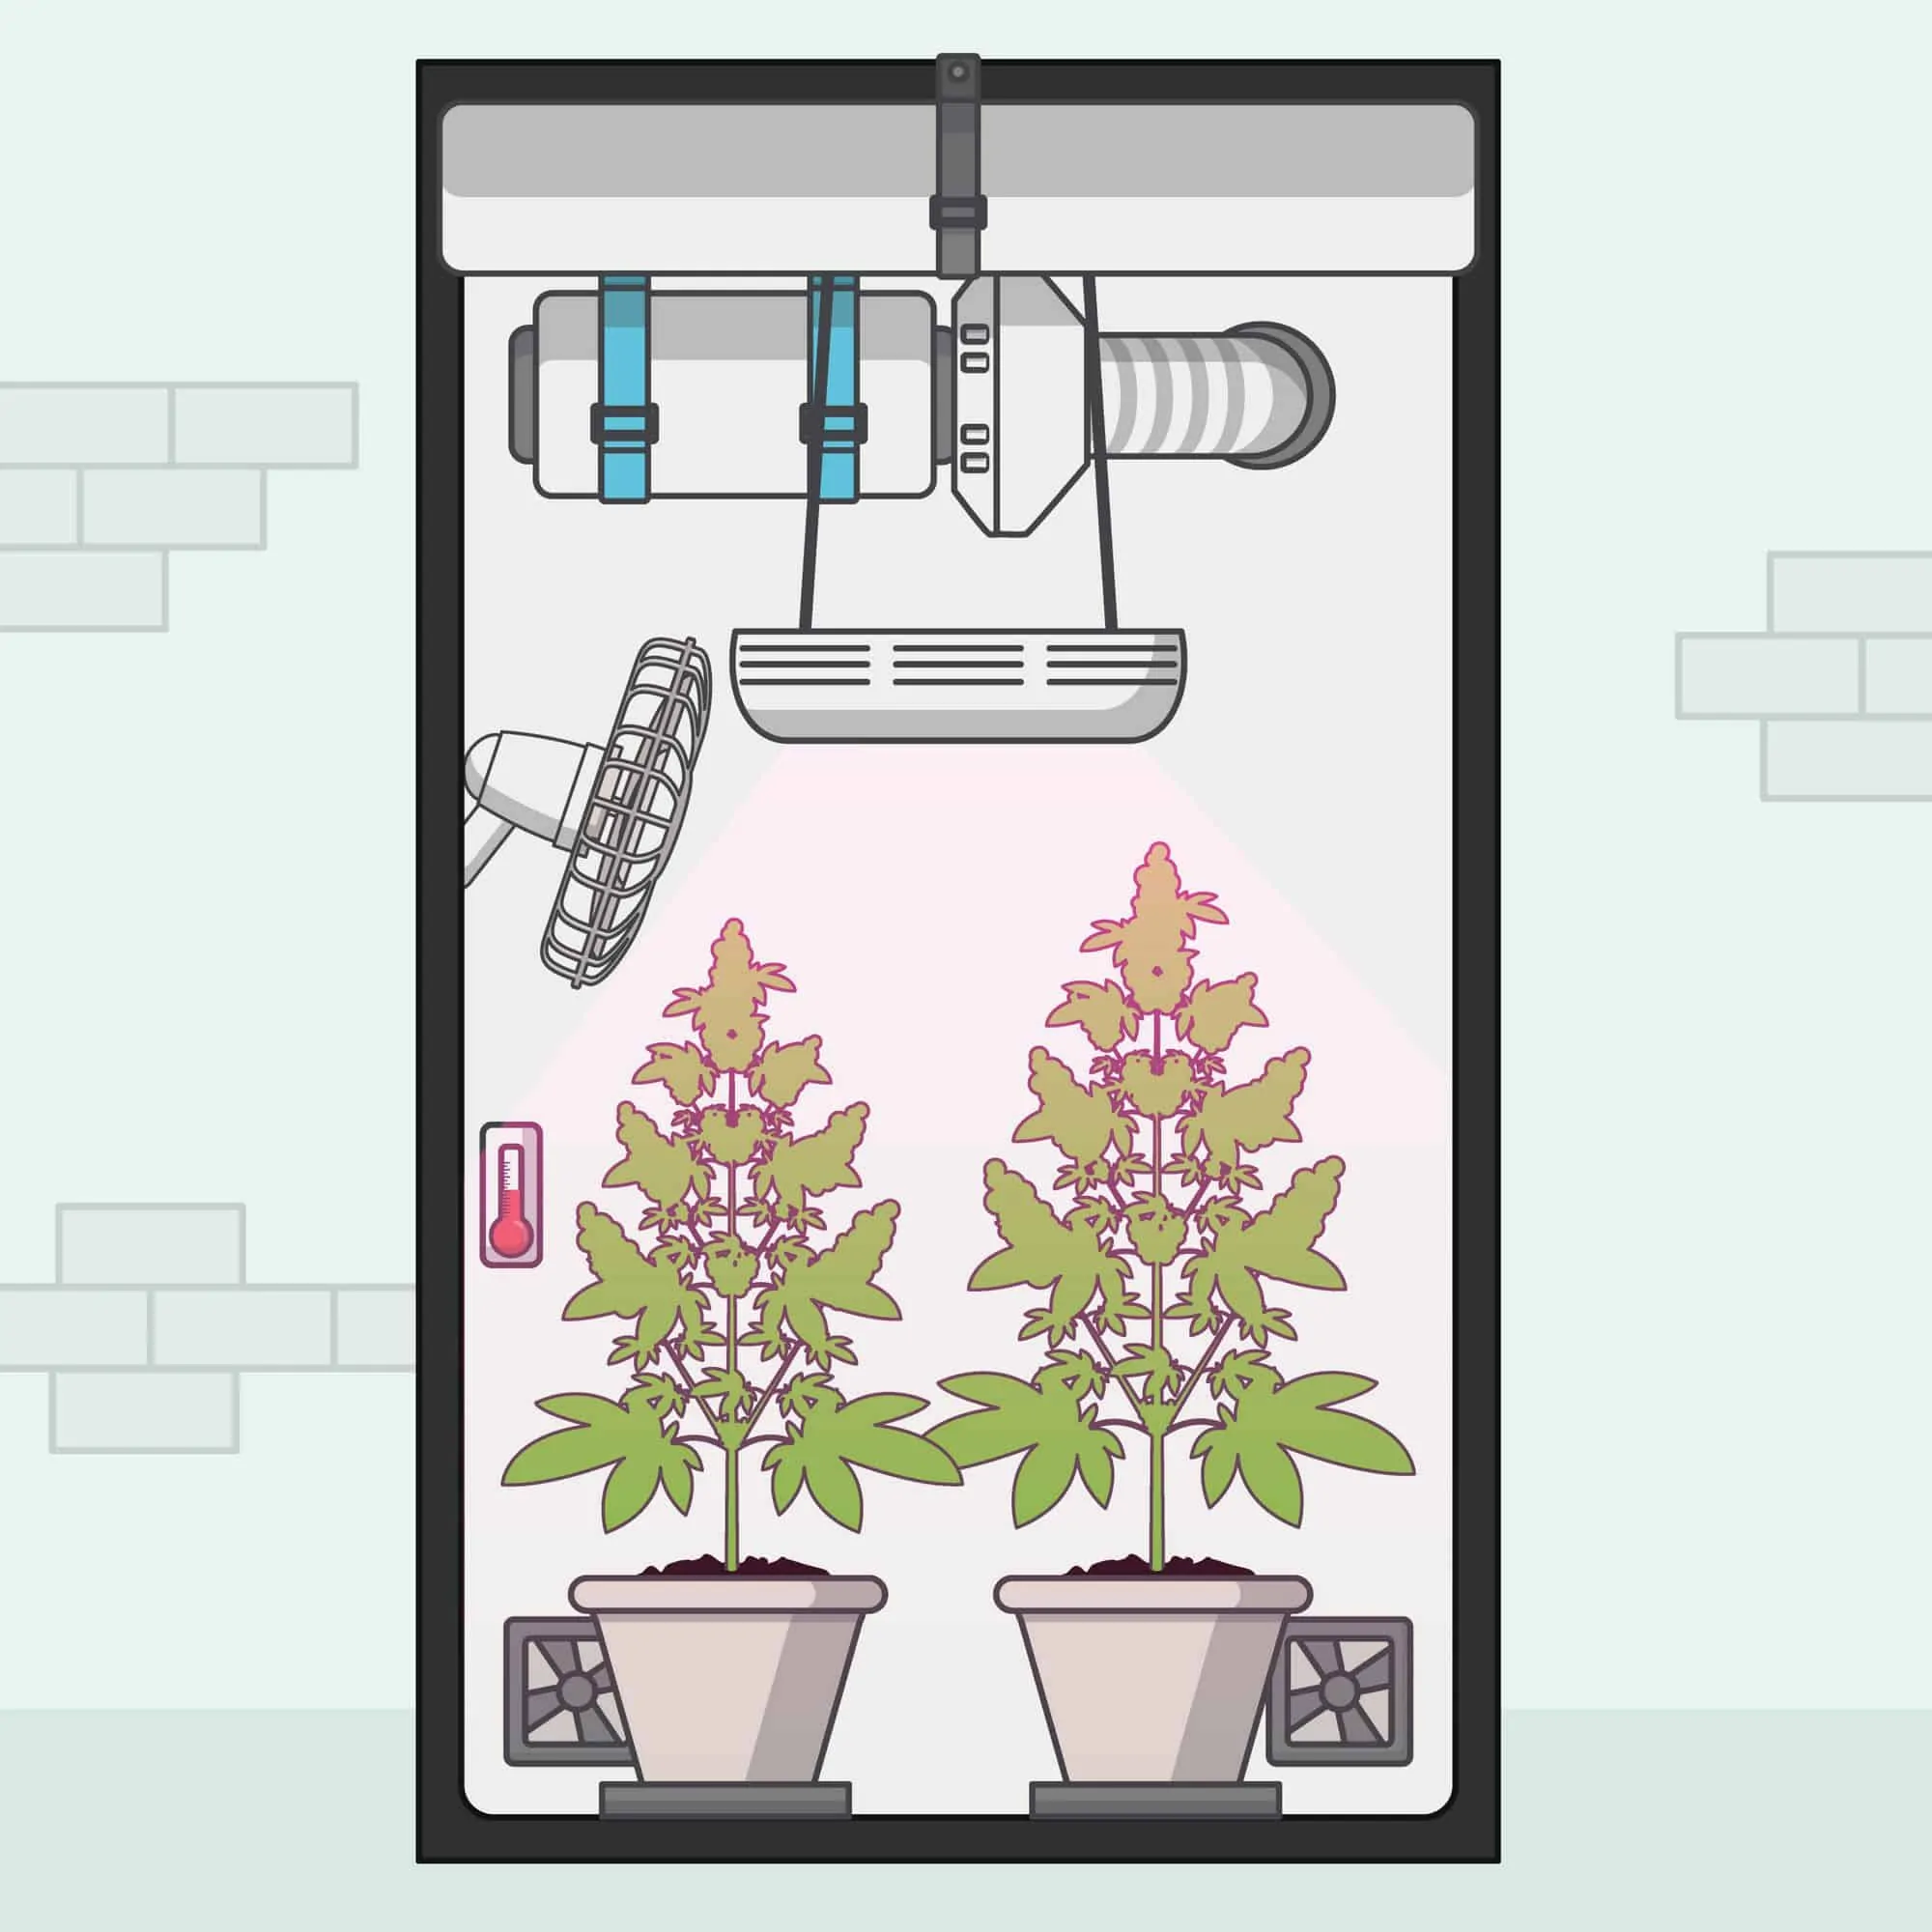
5. Ventilation
Weed plants love fresh air. They achieve the best growth when they get a slight breeze. It also serves to prevent mold. The best way to give your plants the breeze they need is with a fan on the lowest setting. You can also remove larger leaves or lollipop your plants to improve air flow.
There is no need to spend a lot of money on a specialized “grow tent” fan. You can basically use any fan you may already have. If you don’t have one, you can buy them anywhere.
If you need a recommendation, we reviewed the best fans here.
It is small and comes with both a clip and a stand. That means you can clip one to the tent pole above the canopy and have a second one standing on the ground, blowing fresh air below the canopy. It does not oscillate, but that is not really necessary in a smaller grow tent or grow space.
You’ll also need to draw hot air out of the tent and replace it with cool air. This means you’ll need an exhaust fan, at the very least. You may also need an intake fan. This article helps you figure out your cooling needs.
7. What Else Do You Need For The Growing Process?
Since we’re keeping the process simple, I’ll leave it at the bare necessities. If you’ve only got a cannabis plant or two, you’ll be fine with that.
I do recommend a few additional things, though.
Check out this article for a complete list of everything I recommend.
The most important additional items for ideal growth are: a nutrient solution, a pH meter or pH strips, and pH up and down solutions.
If you only have a plant or two, you can get by with just the fan for ventilation. You’ll just have to leave the tent door open at times to replace the air inside.
And you can get by without a charcoal filter to remove the odor as well. Ideally though, you want to ventilate your tent and you want to remove the odor from any air you ventilate out.
8. Start Growing Cannabis Indoors
Now that you have all your equipment gathered, it’s time to start growing cannabis. Well, there is one more thing you need. The most important of all. The actual cannabis plants.
The Best Places To Get Cannabis Seeds
If you know someone who is growing marijuana plants and can hook you up with seeds or clones, lucky you! You can skip this section. If you have clones, head here to learn how to get clones to root faster.
If not, your best bet is to buy seeds online from a seed bank. Most people prefer to buy from a bank located outside the US, though this really doesn’t matter much anymore.
The thinking is that having seeds sent across state lines could get you in trouble, since growing marijuana is a federal crime. But it is highly unlikely that anything will happen. In the highly unlikely event that your seeds are discovered, they will most likely only get confiscated.
But if you buy from outside the country, the worst that will happen is that they are confiscated at customs. That’s it. You don’t even get put on a list. Then you just contact the seed bank and they will send you a replacement shipment (if it’s a good seed bank).
These days, however, this is basically the same thing that happens when you ship inside the US. That is why our favorite online seed banks are both headquartered in Europe, but they have warehouses in the US. This cuts down on shipping times considerably.
Our favorite bank to buy from is I Love Growing Marijuana. They are based in Amsterdam, but they have a distribution center in the California. As mentioned, this cuts down on shipping times. Their seeds are high quality and they even have their own unique strains.
- Best Feature: 100% Germination Guarantee
- Shipping: Free to US, $25 to Aus
- Bonus: Free Grow Bible (find it here)
The biggest plus is their germination guarantee. If your seeds do not germinate, they will replace or refund them. The primary drawback is that they currently only ship to the US or Australia. If you do not live in either of those locations, read the next paragraph.
Crop King Seeds is another great option, especially if you are not in the US or Australia. They are headquartered in Vancouver, Canada and they actually have physical stores in Canada as well. They ship anywhere in the world.
- Best Feature: Seed quality
- Shipping: $20 to US/CA and $20-$40 worldwide
For the US, we prefer ILGM, due to their germination guarantee and the free shipping. Crop King has a guarantee, too, but they only guarantee that 80% of the seeds will germinate. They also charge for shipping, with rates in the US being the lowest at $20 and international rates as high as $40.
You can read more about ILGM here and about Crop King Seeds here.
I would always spend a bit more and buy feminized seeds.
Only the female cannabis plants make buds that can be smoked. Buying feminized cannabis seeds saves you the trouble of identifying and removing male plants later on during the flowering stage. It also means you don’t waste time of seeding and vegging male plants, only to have to eliminate them.
I know many beginning indoor cannabis growers want to spend as little as possible, so they start by growing bag seed. I did this myself, so I won’t tell you not to, but you should be aware of the problems you may face.
This article covers all the possible issues and also guides you in maximizing your chance of success if you want to grow weed with bag seed.
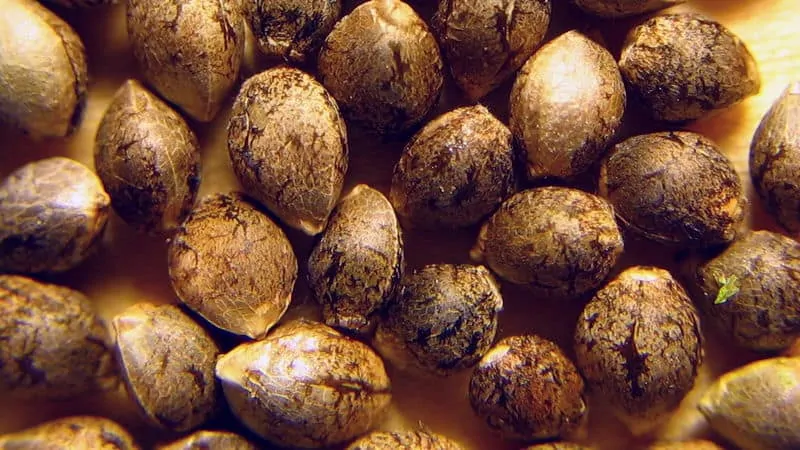
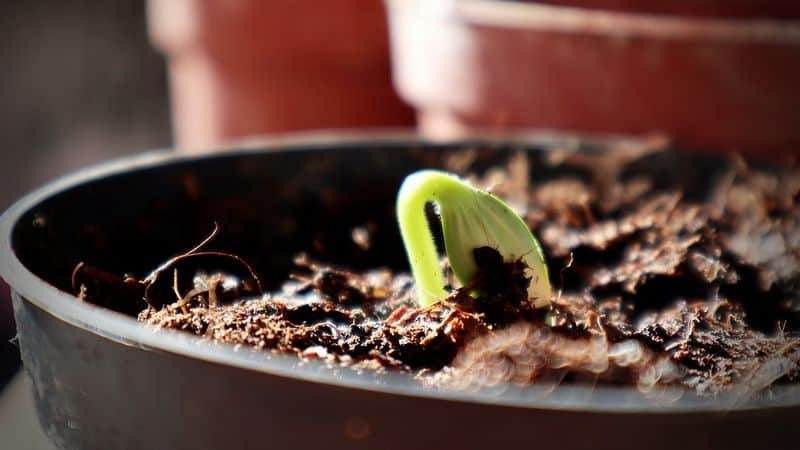
Germinating Your Cannabis Seeds
The easiest way to germinate seeds of marijuana plants is to use a starter cube (or seedling plug). Rapid Rooters are great. There is even a version that comes with a tray.
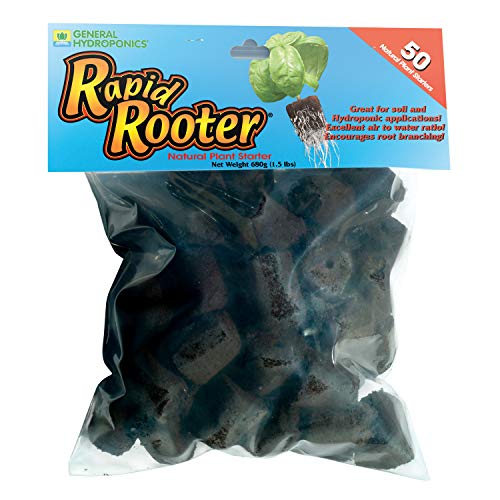
You simply put the seed inside, keep it warm and slightly moist and when the sprouts and root appear after a few days, put the whole plug, seed and all, into the soil in your seedling pot. That way you also don’t have to worry about handling the delicate seeds once they have sprouted.
If you don’t want to bother with the Rapid Rooters, you could also just germinate your seeds in the same container that you plan on using for your young seedlings. It could be a plastic cup or a 1-gallon fabric pot or whatever.
To do this, plant them the cannabis seeds about 1/2 to 1 inch deep (1.3 to 2.5 cm). The soil should be moist, but not soaking.
Keep it that way during the entire germination process by adding water whenever it begins to dry out. You also want to keep the seeds warm, either with a heating pad or with a light that gives off some heat.
If you are using the Ocean Forest potting soil, you might want to mix it with a lighter potting soil for the seedling pot.
If not, the seedling will suffer some nutrient burn, but it is not really that serious. I’d probably mix it, to avoid the nutrient burn, but it will not cause permanent damage to your plants.
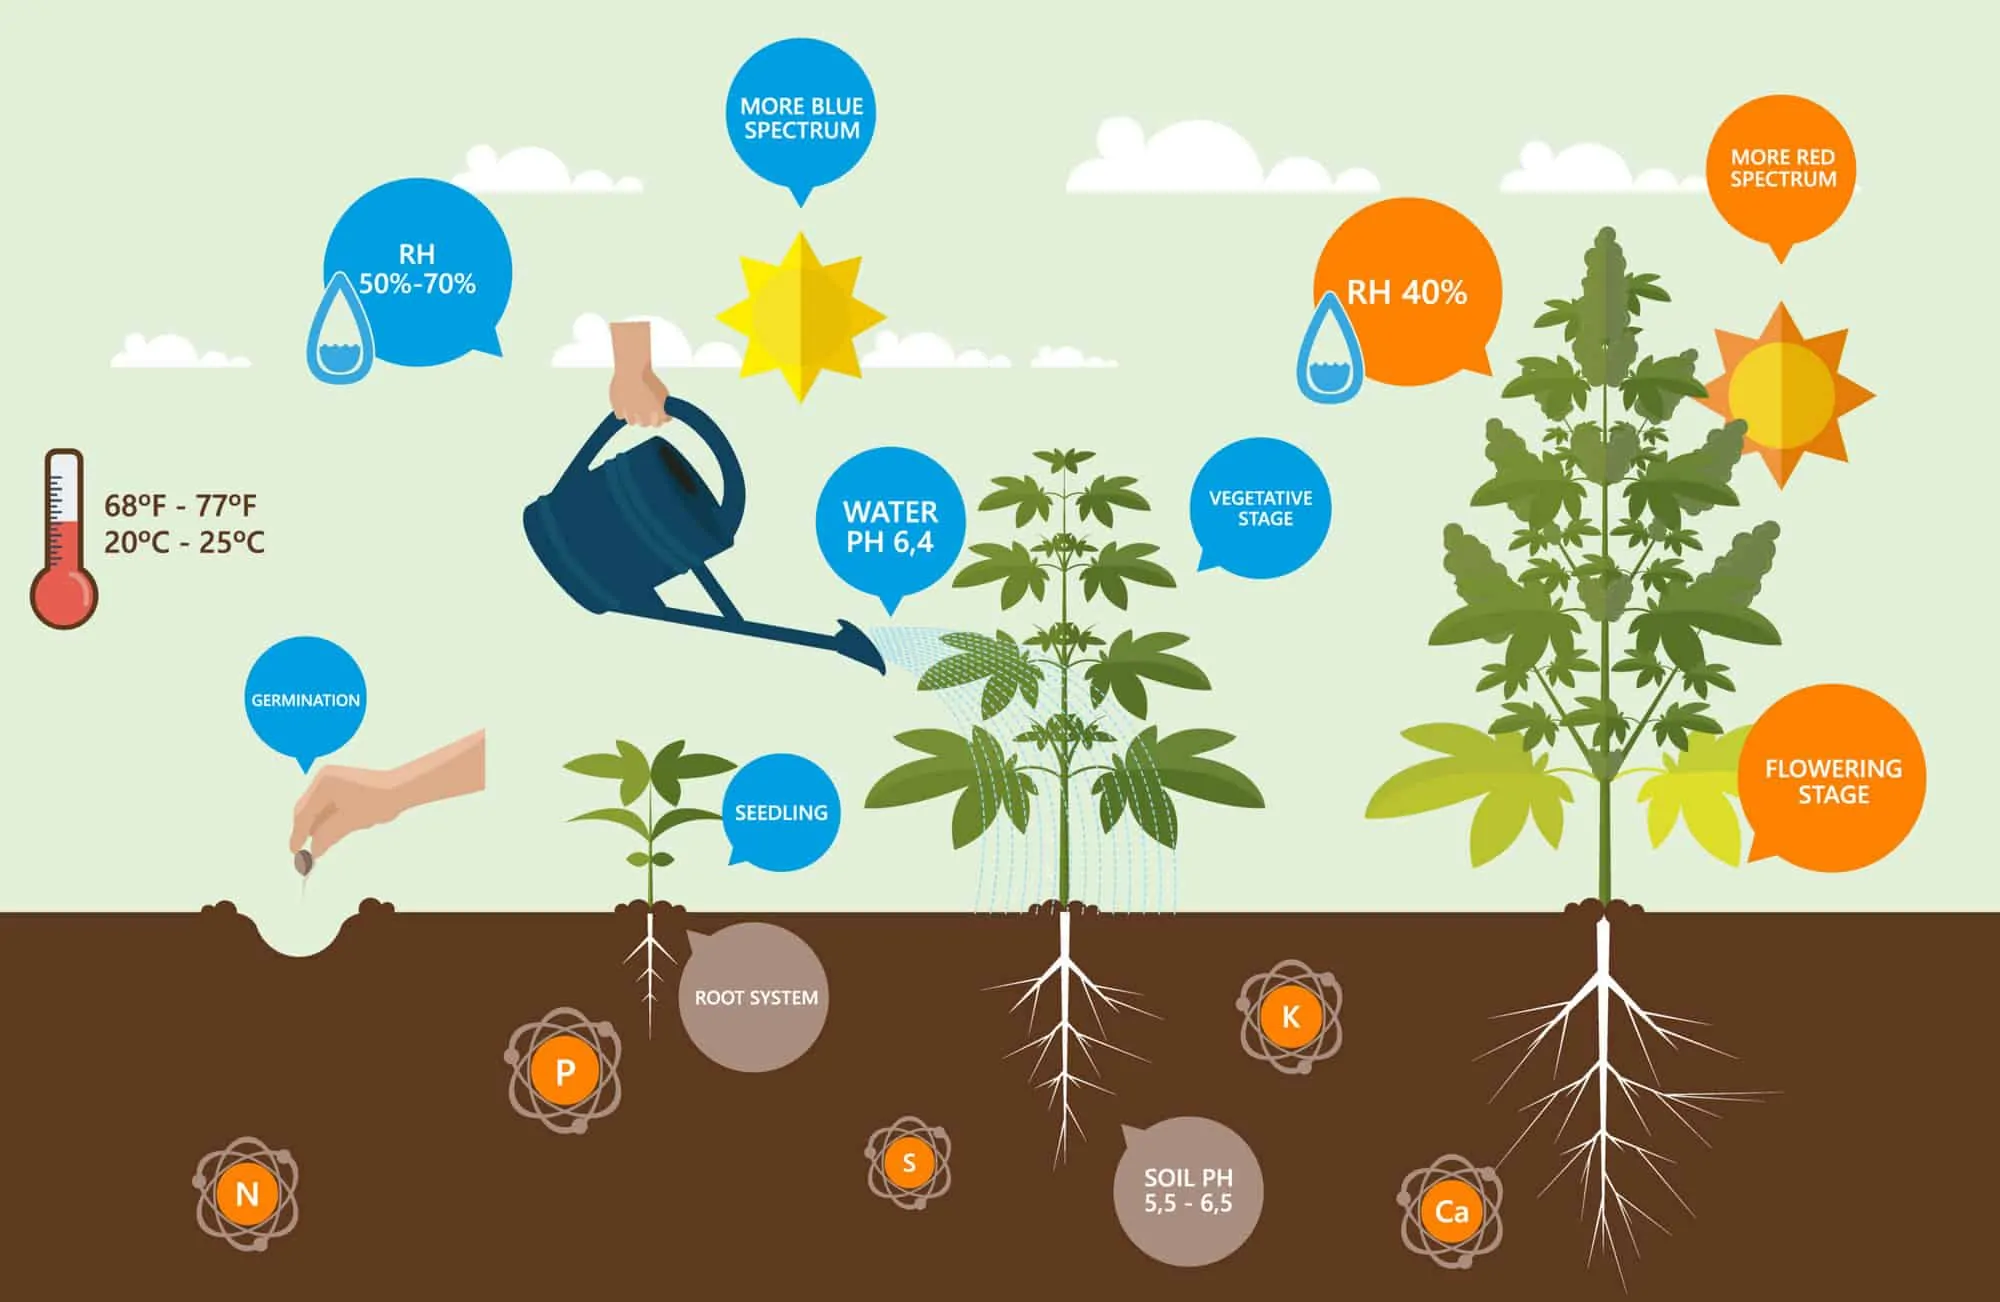
Try to keep the temperature during seeding around 73° F (23° C) and the humidity around 70%. Give them 18 hours of light per day, followed by 6 hours of darkness.
You don’t need a powerful LED grow light during this stage, but you can use it. Just hang it higher, to keep from harming the delicate seedlings.
Many growers prefer using a weaker light for seedlings to save on power costs. If you have a lot of seedlings, a T5 light fixture is best. I prefer T5 LED lights. If you prefer fluorescent, you’ll find the best options here.
If you’ve only got a few, a CFL bulb will work just fine. This article tells you what you need.
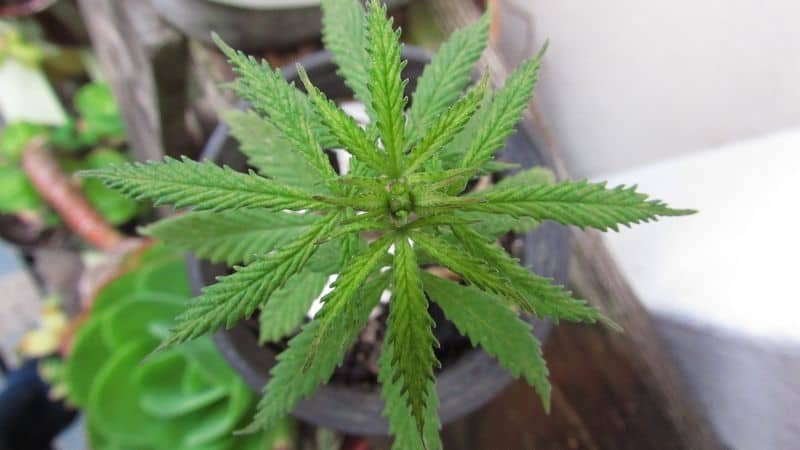
Once your marijuana plant grows its first set of regular leaves (i.e. not the seedling leaves), it has officially entered the vegetative stage.
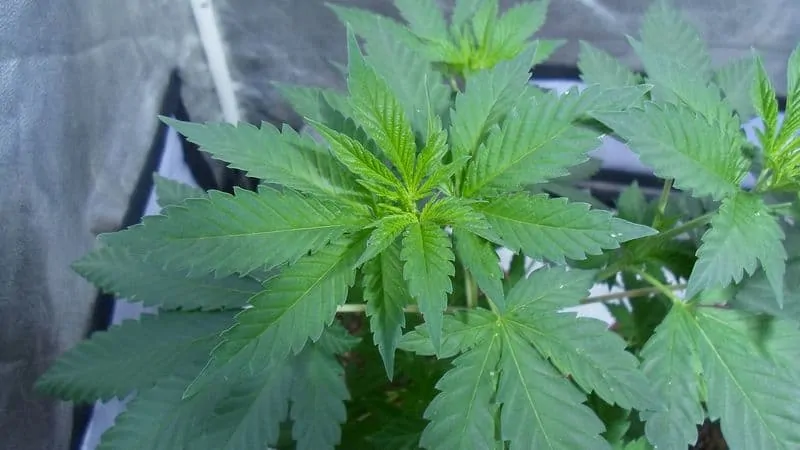
Vegging Your Cannabis Plants
The vegetative stage is when your marijuana grow starts to get exciting. The plants grow fast, but do not yet produce any buds or flower. The great thing about growing marijuana indoors is that you get to control everything, meaning you can provide the ideal conditions for maximum yields.
The first and most important thing you have control over is lighting. During vegging, you want to keep your grow lights on for at least 18 hours per day.
Some growers like to give a full 24 hours of light, but I recommend going with a schedule of 18 hours on and 6 hours off.
You also control the air temperature and humidity. For vegging you want the keep the grow area between 70 and 85° F (20 and 30°C), with a relative humidity of 40 to 60% (I’d stay over 50%).
If you don’t have a thermometer or humidity monitor, don’t worry too much. As long a your cannabis plants are not freezing or scorching, they will grow. Keeping the environment in the ideal range just means faster and better growth.
Make sure you water your plants regularly. Whenever the top inch of soil feels dry to the touch, give them more water. Water them until you see around 20% extra runoff water come out of the bottom of the pot. Be careful not to water too often. Always wait until the top one inch of soil is dry.
If you use a nutrient rich soil, your plants will be getting a good amount of nutrients, at least for a while. Eventually, you will need to provide more, by adding them to your plants’ water. The best water for marijuana plants should contain all the nutrients they need.
Begin by adding half the amount indicated on the nutrient schedule that came with your nutrients. If plants are growing rapidly and need more nutrients, up the dosage to 3/4 of the indicated amount.
I highly recommend training your plants during vegging.
Left on their own, they will grow tall and end up in a Christmas tree shape. This is not ideal, because it means one large bud at the top and not much else.
You want your plants to grow short and fat, with multiple peaks that are all about the same height. That way, each peak gets the same amount of light and grows the same large bud.
There are a number of ways to achieve this. I prefer bending the young main stem downward and tying it down, forcing it to grow horizontally. Then multiple other stems will grow upward from it. You can find much more on training your plants here.
Whenever your plants grow too large for their pots, but you want them to keep growing, you need to repot them.
If you fill the new pot with fresh soil (assuming you are using a nutrient rich soil), remember to stop adding nutrients to the water until the plants have used up the nutrients in the soil (about a week).
How long should cannabis plants stay in vegging?
This is entirely up to you. You can keep them in this stage indefinitely, if you like. This is actually what growers will do with a female plant, if they use her for quality clones.
When you should take your plants from vegging to flowering depends on how large you want them to get. An average strain will double in size during flowering, so you want to take it out of vegging when it is about half the size you would like it to end up having.
This does depend on the strains, though. If the strain is labeled as short, you can expect it to not double in size during flowering. If it is labeled as tall, you can expect it to more than double in size.
Flowering Your Weed Plants
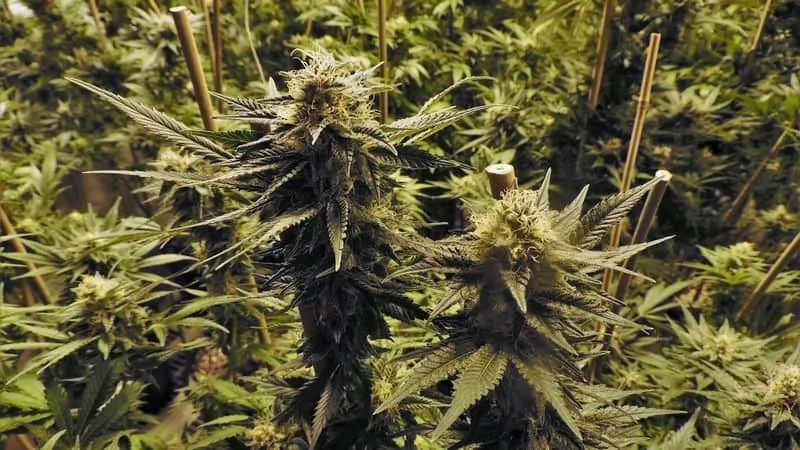
To get your plants to enter the flowering stage, simply adjust the amount of light they get every day. Change the lighting schedule to 12 hours on and 12 hours off and your plants will begin to flower.
Marijuana plants also need a lot more light during bloom, so you want to make sure you give them what they need. Powerful LED grow lights are best, but I also highly recommend CMH lights.
HPS works well too, as it always has, but I don’t recommend it anymore, since LED and CMH are better. Assuming quality LED grow lights, of course.
During flowering, plants become more sensitive to humidity, so you want to keep it lower to prevent mold.
Keep the temperature between 65 and 80° F (18 and 26° C) and maintain a relative humidity between 40 and 50% during the beginning of the flowering stage and 40 and 45% during the final weeks.
A week or two weeks after you switch to the flowering light schedule, you can finally see the gender of your plants. If you used feminized seeds, they will all be female and you have nothing to worry about.
If you used non-feminized seeds, you can expect about half of your plants to be male. Now that you can identify the males, you need to remove them from your grow room and get rid of them immediately. If they pollinate the females, you end up with buds full of seeds.
You can tell the difference by the pre-flowers they grow at the tops of branch joints (the “V” where the stems meet the trunk):
- Female plants start growing longer and thinner pre-flowers that are often fat on the bottom. Eventually, wispy white hairs emerge from the top.
- Male plants start growing balls/pollen sacs that have no white hairs or pistils. You can get a lot of them, which looks like a bunch of small grapes.
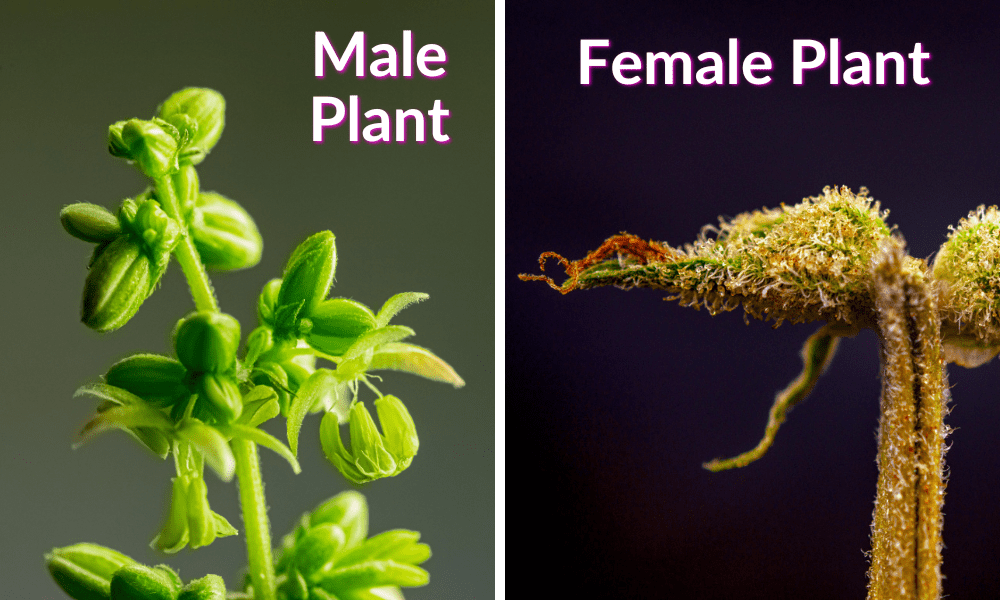
Sometimes the male and female growths look very similar, but if you see white hairs, it is female. You’ll find more information on how to tell if your plant is male or female before flowering here.
Even after removing the males, you should keep a close eye on the females. It is possible for them to become hermaphrodites, which usually happens if they are stressed.
If that happens, you can try removing only the section of the plant that has begun forming male parts, but I recommend removing the entire plant, just to be safe.
If you don’t want to destroy it, you can continue to grow it separately from your other plants. That way you don’t loose the harvest (though it will be full of seeds), but the hermie plant also can’t pollinate the rest of your females.
The other important task during flowering is to make sure your buds are all getting sufficient light. If you see a bud in the shadows, try to get it light so that it can grow and give you extra yield.
The best way to do this is with supplemental lighting. Another reason to add supplemental lighting is if your primary fixture is not heavy in red spectrum light. In that case, some smaller all-red LED lights would really help boost yields.
Some growers will use scissors to trim off large fan leaves that are blocking light. I would caution against this for your first grow, since those fan leaves are what turn light into energy. If you remove too many fan leaves, your buds don’t get the energy they need to grow big.
Instead, you can try tucking away some of the fan leaves, if they are impeding the light and causing shadows on your buds.
When is comes to actual nutrition, cannabis plants need much less nitrogen during flowering. If you bought a nutrient set made specifically for cannabis, it will contain a ‘bloom’ or ‘flower’ bottle. Switch to that one now, since it contains the right mix for flowering.
For the first month of flowering, your marijuana plants need a lot of nutrients. After that, they need less and less. Reduce the nutrients you give them gradually, starting around the halfway mark of flowering.
During the last two weeks before harvest, it is a good idea to flush your plants. This means you should give them plain water, with no nutrients. This ensures that the nutrients do not impart a flavor on the buds.
Your plants will look like they are slowly dying during this time period. That’s because they are. As the near harvest time, they will look pretty rough, because they stop taking in nutrients and everything they have is funneled into bud growth.
This is normal, so do not panic and give them more nutrients. They do not need them and the nutrients will only harm the flavor of your bud.
Many growers even stop watering altogether during the last 3 days to one week before harvest. When to stop watering before harvest depends on the strain, but anytime within that range will have positive benefits on bud size and potency.
In general, the flowering stage lasts a minimum of 2 months (or 8 weeks) and some strains of cannabis need to be flowered for 3 to 4 months. Then it is time to harvest.
Harvesting Your Weed Plants
How do you know when to harvest?
It depends a lot on what you want.
Harvesting a bit early results in buds that give you a buzzed, heady experience. They cause anxiety and headaches in some people.
If you harvest later, you get more of a stony, relaxing bud. Harvesting very late results in weak bud that makes you extra-sleepy (why would anyone want this?).
The good news is: there is a fairly large window of time for when you can harvest your bud. Everything really depends on the strain and your personal preference. Just make sure you don’t harvest too early. That is the biggest mistake people make, so you can usually wait longer than you think you should.
There are two main methods for determining when to harvest. The first is easy, but less accurate. The second requires a magnifier.
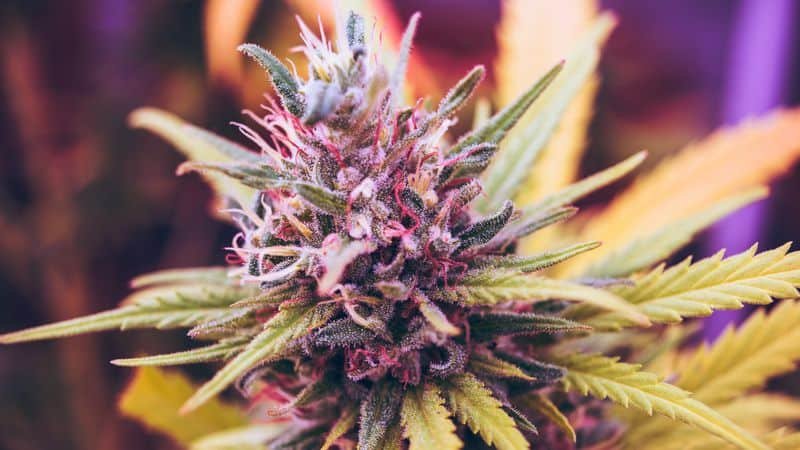
Method 1: Check the Pistils
The quick way to determine when to harvest is to look at the little white hairs that grow out of your bud. These are the pistils and eventually they start to curl inward and darken. They can turn any number of colors: red, yellow, purple, pink, brown, etc.
To know when it is harvest time, you first need to wait until your buds stop growing new hairs. This is where many inexperienced growers jump the gun. Make sure they are done growing white hairs, because sometimes they just pause for a bit, then grow more.
Once new white hairs have stopped growing, wait until 40% of them have darkened at least. 40% is the beginning of your harvest window, but you should wait longer.
Harvest when 50 to 75% of the hairs have darkened for maximum THC levels. Wait until 80 to 90 % have darkened for some of the THC to turn into CBN, which is more relaxing and gives you that “fuse-you-to-the-couch”, anti-anxiety effect.
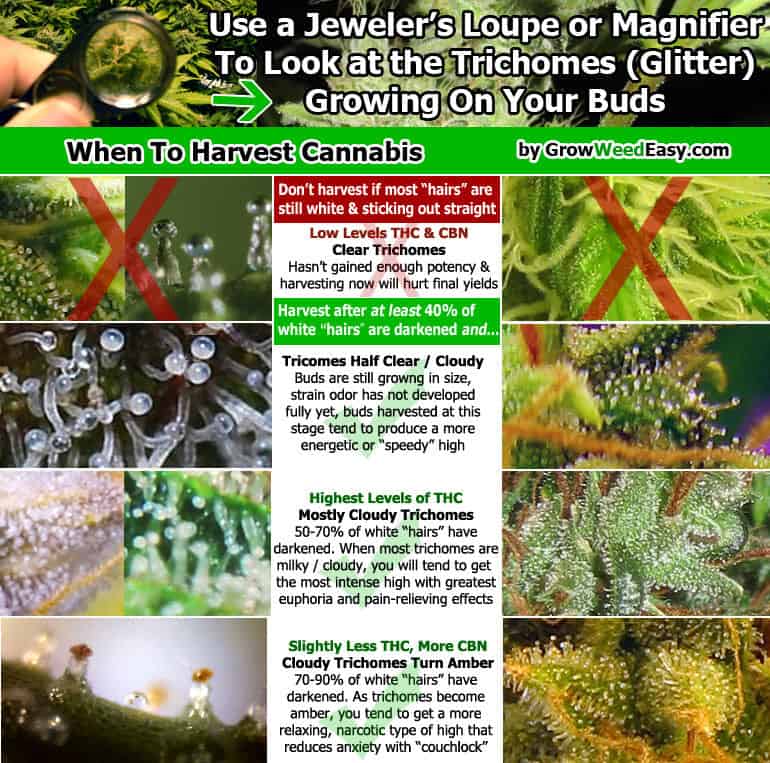
Method 2: Check the Trichomes
This method is more accurate, but you need a magnifier of some kind. The best microscope for checking trichomes is the digital type, since it gives you a more accurate image.
That said, a jeweler’s loupe like this one is generally much cheaper. I’d pay more and go with a full microscope, though.
Use the magnifier to examine the trichomes. These are the crystals, or the frosty-looking stuff you see accumulating on your buds.
You only care about the ones with the ball on top, that look like little mushrooms. These are the ones that give weed its potency. The color of these trichomes determines when to harvest your weed.
- You get more of a heady high when some trichomes are clear and some are cloudy or milky white
- You get the highest THC levels when most of the trichomes have turned milky white or cloudy
- When the trichomes have become darker (generally amber or gold, but sometimes pink or purple) you have reached the end of the harvest window. Harvesting now means more CBN for a more relaxing and anti-anxiety high.
Here is a graphic that shows you what to look for:
Best Way To Grow Weed Indoors: Final Thoughts
Once you have harvested your bud, it is time to dry it and cure it. I will cover that in a separate article, since this one is about growing weed indoors.
If you have any questions about growing, please feel free to leave a comment below. I read them all and will answer any questions I can.
Michael Mack says
If you water everytime the firet inch if soil is dry your not letting your medium fully dry out which means root rot, and your bottom roots aren’t getting oxygen they need to thrive..it also means they are never in search of moisture which means they dont stretch out and developed as fast.
You have a lot of good info man but you spread alot of misinformation as well.
Steven says
As long as you have adequate drainage, the soil will not stay waterlogged and the risk of root rot is minimal. It’s only when the water has nowhere to go and sits in the bottom of the pot that root rot and lack of oxygen become an issue.
Fdog says
Spot on thanks for taking the time to do this and sharing your knowledge 👍
MOTOPSYCHO says
I agree that as long as you have ample drainage root rot is unlikely. I ran a landscape company with a nursery. Thanks for all the info. This is gonna be my first grow!! Hope I get it right.
Jason says
Thanks for the great article it was very helpful.
Stephen says
This is a very good article Steven… I’m actually not a ‘Novice Grower’, however it has been a good six years since I stopped growing… My first grows were photoperiod which, towards the end of the grow, became a bit stressful with the constant battling to control heat and stopping the plants taking the roof of my tent off… I then moved over to autoflowers, which alleviated the height problem, but not the heat issues…
What I discovered when I decided to start growing again was how far technology had moved on in those six years… Not just with super strains of autoflower seeds and cannabis specific growing soils, but more so with the huge leap forward in LED lighting which, back then, was in its infancy and considered to be ‘quirky’ rather than a viable alternative to the old ‘gas guzzling’ HID’s…
With advancements in technology you also get a huge amount of internet misinformation… Much of the information contradicts itself and you are left feeling a bit ‘overwhelmed and confused’… Consequently, I was very pleased to stumble upon your site… You have a ‘no nonsense’ approach which I find refreshing… Whilst you definitely cater for seasoned growers, you also cater for first timers how are trying to get into growing on a limited budget… And, as you quite correctly point out in your article, you don’t have to spend a ‘king’s ransome’ to grow your own good quality bud… Sure, if used correctly, the best equipment will increase yield and strength but, to be perfectly honest, after smoking for 40 years, any strain over 15% THC is going to give you a very satisfying high, and if a novice can come away from a grow with 5oz of nice dried bud with a minimal investment… then who can moan about that?… Should easily last until their next grow if going down the Auto route… and of course, their next grow will be better as lessons will have been learned…
So anyway, being a novice on the LED front… like everyone else, my simple question was, “Which one should I buy?”… Well, you’d go to 20 sites and end up with a list of 20 different lights… I was beginning to ask myself if I could be bothered with the hassle until I stumbled upon your site where you gave a great unbiased review on the Phlizon range of CREE COB lights and I didn’t look back… That was just what I needed… You recommended them and said why… With my small set up, the 1000w was perfect for my needs and two weeks into the grow my plants look closer to three weeks old… Lovely, happy and healthy plants… I’m delighted with your advice, delighted with my lamp (which didn’t break the bank) and delighted with my grow (so far)
Thank you for your solid advice…
Anonymous says
Bevesta
Marc says
This is a great write-up, especially after all the articles I have been through. I’m into my 4th grow & still learning, learning, learning. I was brought here because I was reviewing exactly what does “flowering time” mean & when does it start. My flowers look good, but according to some articles they are aways away from being ready to process. After reading here I have a little clearer picture of what flower time is & when harvest time actually is. I appreciate your time you have put into publishing your web site for all of us to see & use.
Regards,
Marc
Mohammed says
I’m on my very first one here really really appreciate your advice and comments will be doing as written and see what I get.
Is their any kind of machine I can check the
Strength of my grow test the THC etc.
But thanks for everything.
God bless you all 👍😃
Jodi says
I hope this isn’t a stupid question, but this is my first time growing. Once the plant is harvested- is it essentially done? How can I get seeds from it if All I got were feminized plants? Thanks!!
angry E says
you can’t. the only way to get seeds is by fertilizing a mature female during the flower cycle. for that, you need a male plant tp produce the pollen to fertilize. i think though you might even be able to buy pollen online, which might be the best option if you know what strain your females are and want to cross-breed with another strain you like..
Bill says
Growing cannabis indoors and outdoors both have advantages. However, growing indoor medical cannabis in California is a winning method for everyone. Premium flowers get maximum growth, are pest-free, and don’t use as much water as outdoor operations. With California in a drought, which is a reoccurring problem, keeping plants hydrated without wasting water is the best option for California and the environment.
A high-tech indoor facility provides excellent climate control that ensures brands can create the perfect environment for plants, producing high-quality flowers. Controlling the environment eliminates exposure to extreme weather events, increasing the trichome count. Additionally, it offers security and safety for the premium buds, limiting outside exposure and contaminants while preventing theft. The extra protection helps keep prices affordable for patients. Although the start-up costs are high, it reduces overhead and assists in stabilizing expenses in the future
Faizee says
I pray ya all don’t get caught
Anonymous says
rewt
Maggie says
When should I start topping its got 5 knots so it will grow short and fat and should I be putting miracle grow water on it ?
Corey says
NEVER use Miracle grow
Mel says
Can I ask why?
Kedra says
A couple of my plants had some powdery white mold so I separaed them from the ones I didn’t see any mold on and I sprayed all of them with vinegar I thought all of it was gone. But it is 2 weeks later and out of nowhere there is the white powdery mold on the leaves and white spots on the stems!!! I am obviously doing something wrong can someone please point me in the right directions, PLEASE!!
Anonymous says
Control your humidity.
Danial says
Hey bro. Im danial. From iran. Low facilities 😂. May i use mirror as reflector?
Sarah says
I’m trying to grow my plant it gets so tall always really skin and falls down and dies 🥺 what am I doing wrong?!? Thanks for your help and support your awesome❤
Robert Tompkins says
Thank you. Very informative article.
serdiB says
I have been looking for an article like this for a long time. thank you so very much, it was really helpful
Jerome Boeglin says
I wish I could send you pictures of my set up. I have literally spent no money and had one successful grow and about to complete another inside my closet. I had a grow room up in the attic of the apartment building. But the jealous maintance man snitched me out. Also I let my males spawn because I don’t have the money to buy seeds. My females were budding and producing a shit load of seeds and the punk snitched me out. I am old school I’ve been smoking for 44 years and trying to grow for 42. When me my old lady moved in together I told her “all bills paid” always so I can grow my weed in the closet.
David Herman says
first time grower here, at 9$ a seed the stress of not getting a viable plant is a pain. I have 5 sprouts and I can’t seem to leave them alone. I need more pictures of the beginning stages and light strength and length. I am afraid I will burn them at 40% of 1000 watts.