 Setting up your first grow tent is daunting.
There are so many things you need to think about.
First, there is the tent itself. Then all of the components you need inside it, for the best grow tent set up.
You also want to avoid unnecessary components. Why make things more difficult than they need to be?
And, as if finding a good tent and all of the required equipment isn’t enough, you then need to install it all correctly.
The good news is that it is all far easier than you think, as long as you know what you are doing.
And that is exactly what we are going to help you with today. Keep reading to learn exactly how to set up a grow tent to ensure your first marijuana grow is successful.
Contents
Best Grow Tent Set Up For A Beginning Grower
The best grow tent setup for beginners includes all the essentials, but nothing else. There is no need to complicate your first grow with a bunch of additional equipment, even if that equipment does come in handy.
Keep it simple in the beginning and get the basics down. Once you have a few successful grow under your belt, you can start adding additional equipment to simplify things or to give you slight boosts in yield.
With all of this equipment, we always recommend getting the best options you can afford. The market is flooded with cheap grow equipment, but trust us when we say you want to stay away from these.
You may think you’re going to save a few bucks, but you’ll end up having to replace these much sooner than quality items. We include links to articles that recommend the best value gear on the market. It is not the absolute cheapest, but it is still very inexpensive. In short, it offers the best value for your money.
How much does it cost to grow weed, if you buy cheap or if you buy the best? To get setup with everything you need, you can expect to pay between $235 on the low end and $1025 on the high end.
With the mantra “keep it simple” in mind, let’s go over all of the essential gear you need to put into your grow tent. Let’s start with the tent itself and then have a look at the other gear you will need.
The Grow Tent
There are a few key features to look out for when selecting the best grow tent for your needs. They are:
- Size and Shape: Grow tents come in a range of sizes and set-ups. Take a look at the area were you are planning to locate your grow and use that as your guide. You also need to consider if you want a single or multi-chamber tent.
- The Tent Material: Look for options that are canvas and have at least a 150D rating. This relates to the thickness of the canvas, which is highly important in keeping the light out and the stank in.
- Zippers: One of the first things to fail on cheap tents is the zippers. Find an option with industrial-grade zippers that will stop any light leaks.
- Air Vents and Ports: These are essential for airflow and ventilation. Look for grow tents that feature adjustable vents on the sides, as well as ports designed for fans and filters at the top and bottom.
If you are looking to grow photoperiodic strains, and want to have plants at different stages of growth at the same time in a small area then we suggest grabbing a multi-chamber option. This allows you to run a simple perpetual harvest routine in one handy space.
If you are going for autoflowering options then this is less important, but will still make life much easier. We have two articles to help you find the perfect tent for your needs.
- This article covers the best small grow tents, if you are only growing a plant or two.
- This article covers the best large grow tents, if you are planning on starting a more sizable grow operation.
Even if your grow will be somewhere in between, those two articles (especially the one on small tents) will help you find the best grow tent brands, in terms of bang for your money. Those brands all make tents in multiple sizes, so you’ll be able to find the size you need.
My usual recommendation is to just go with a Vivosun tent. They are a Chinese deep budget brand, but they are the best among those types of brands. You’ll get a decent tent for little money. You can see their various offerings here in our Vivosun review article.
Grow Lights
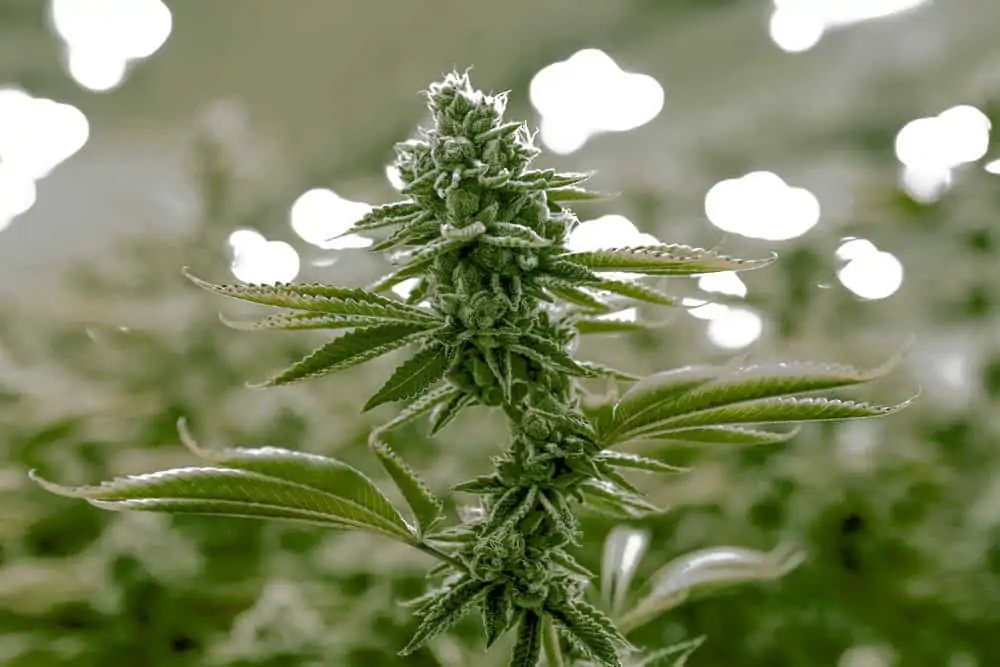
Up until just a few short years ago, there was still heavy debate over which lighting option was best: HID (High-Intensity Discharge) or LED (Light Emitting Diode).
For the best part of the last half a century, HIDs ruled supreme. With great light penetration and high yields, these were the go-to choice for most hobby and commercial grows. But in the past five or so years LED panels have definitively overtaken HIDs as the best option. For a few key reasons.
- LEDs are much more energy efficient, consuming much less power than HIDs, while producing the same amount of light.
- They also don’t produce as much heat, making environmental control a whole lot easier, especially for novice growers. It also means your grow tent will be a lot less stuffy and a much more pleasant environment for your plants.
- They have come down in price dramatically in the last 5 years. Good ones still cost a little more than HID options, but they last a lot longer, they cost much less to run, and they require less equipment to keep the temps and humidity at the correct levels.
- They are full spectrum, meaning they offer the entire light rainbow, unlike HID options. This means the crop will get the full range of light it needs for healthy growth, and you’ll end up with better yields overall.
- Newer LED grow light models now offer better light spread than any other lighting option and can hang closer to the canopy without burning the plants.
Always looking for LED panels made by reputable companies. Read reviews and talk to the experts at your local hydro store before making any decisions.
We also have a number of articles on this site to help you choose the right lighting. The main one to check out is our article covering the best LED grow lights for your money.
I always recommend HLG lights if you want to buy American-made, because they cost less than other US brands, even the ones that actually manufacture in China. My HLG review has more.
If you’re looking for the best value overall, check out our SpiderFarmer review here.
Spider Farmer are a Chinese budget brand, but they are much better quality than most and also have better customer service (but it’s still a Chinese brand). Yes, there are cheaper brands, but the small additional cost for Spider Farmer is well worth the extra peace of mind.
Ventilation
Air exchange is one of the most important factors for indoor cannabis gardens and one that new growers often overlook. Remember, you are setting up an enclosed grow area, so ensuring that you have the right ventilation and air circulation system is key.
How often should air be exchanged in a grow room? You want to replace the air in the room completely every 5 to 10 minutes. To accomplish this, you need an inline exhaust fan.
Inline exhaust fans are designed to remove hot and humid air from your grow tent and passively suck in freshly oxygenated air. You want to make sure that your fans have adequate speed and CFM (cubic feet per minute) ratings. To calculate the CFM, all you have to do is find the volume of the grow tent, and divide that number by 2.
For example, say you go with a 5 x 5 x 6 foot tent. To find the volume of the tent, simply multiply the dimensions together: 5 x 5 x 6 = 150 cubic feet. Then divide that number by 2 to get your exhaust needs: 150 / 2 = 75 CFM.
As long as your exhaust fan has a rating of this number or higher, you will be totally fine. For help in choosing the best fan for grow tents, read this article.
That article also covers oscillating fans, which are also an important piece of equipment. You usually want to run two together: one for the top, and one for the bottom.
This will help to create a uniform airflow throughout the entire canopy, ensuring that your plants are receiving optimal air exchange. These are also important for plant strength, as they will move the plants around and boost the stem and branch robustness.
Carbon Filter
Carbon filters are super important for indoor grow tents. Not only with they significantly reduce the amount of those pungent aromas that can sometimes escape, but also the pollutants, mold spores, and plant diseases that can float about unseen.
These filters contain activated carbon granules or sheets which are highly effective at trapping particles. The process at work is adsorption, not absorption, meaning the particles actually stick to the surface of the filter.
And once they adhere, they won’t be able to escape, resulting in your grow room environment being a whole lot cleaner. Activated charcoal has a ridiculously high rate of adsorption, thanks to the pores that are created during its manufacturing process, resulting in one gram of the stuff having a surface area of over 2700m squared.
Disregard any blog post that suggests making a DIY filter. This is just straight-out bad advice. When selecting a filter, look for one with a minimum of 99% removal rate to make sure that your grow room is as clean and odorless as possible.
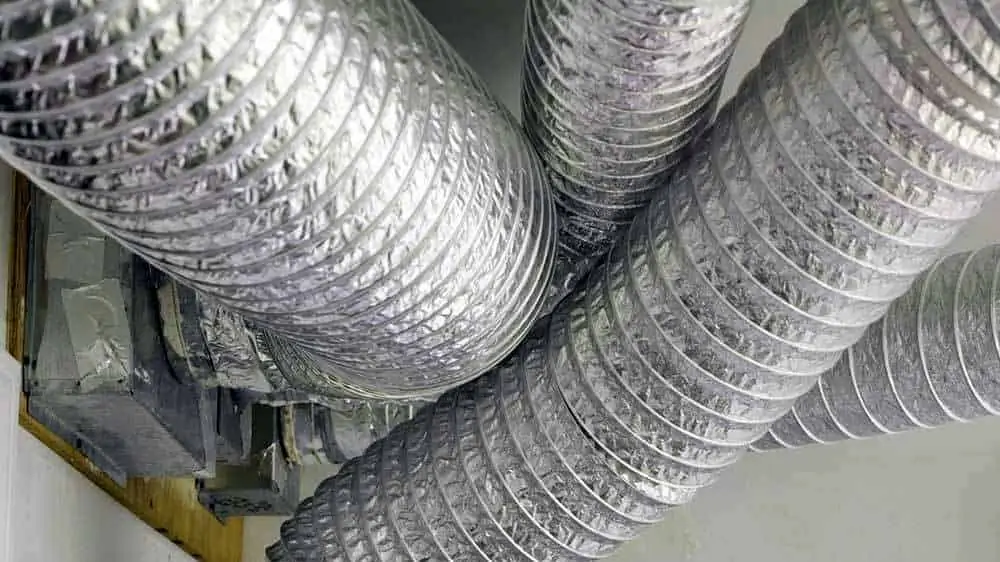
The filter should be rated for a CFM that is equal to or higher than your fan. This should go without saying, but it should also be designed for the same diameter of ducting as the fan. In other words, if you have a 4-inch fan and ducting, then the filter should also be made for 4-inch ducting.
As for where to put the carbon filter in your grow room, you can basically put it anywhere. But most growers put it at the beginning of the air circulation system.
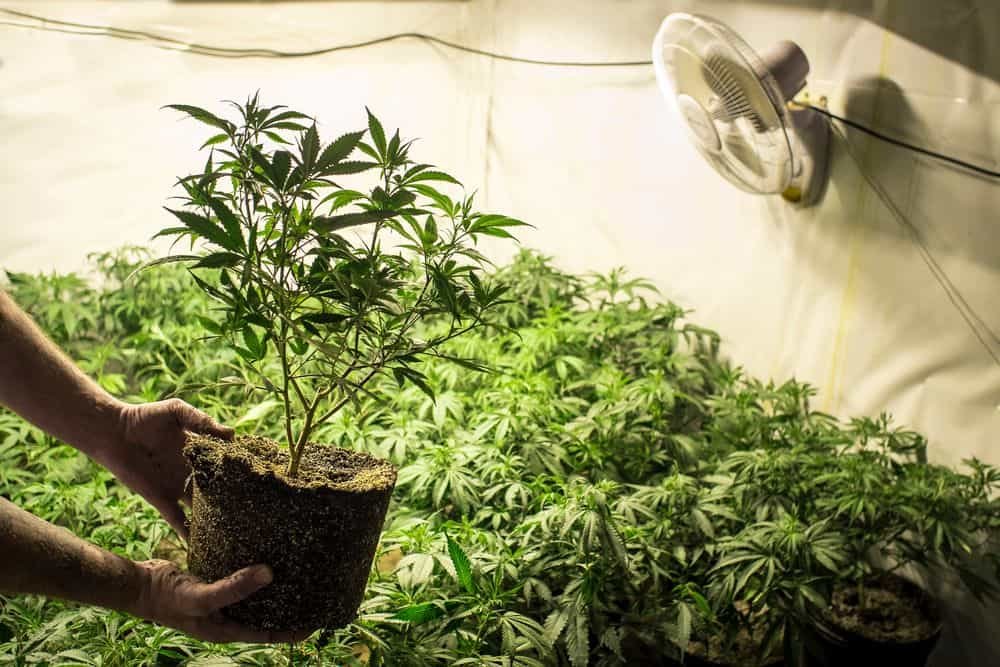
Pots And Medium
Now, there are a couple of major decisions with this option. Namely, whether you are going to run a soil or soil-less (hydro) operation.
If you are just starting out, then forget about pure hydroponics. It’s always best to get a couple of runs under your belt before getting into the complicated stuff. But, there is a perfect option for new growers that strikes an awesome balance between soil and hydro cultivation.
And that option is coco-coir!
Coco-coir is made from coconut husks, and it’s a magnificent option for cannabis gardening. Coco is an inert (zero-nutrient) medium that acts in many ways like soil, but comes with a bunch of the advantages of hydroponics.
It is almost impossible to saturate, super easy to flush, holds way more oxygen than soil (about 70% more), and is exceedingly light. This means that you don’t have to worry about root rot, overwatering, or nutrient deficiencies. In other words, it’s perfect for beginners.
Read our article on the differences between soil and coco coir for marijuana growing, if you are not sure which medium is best for you.
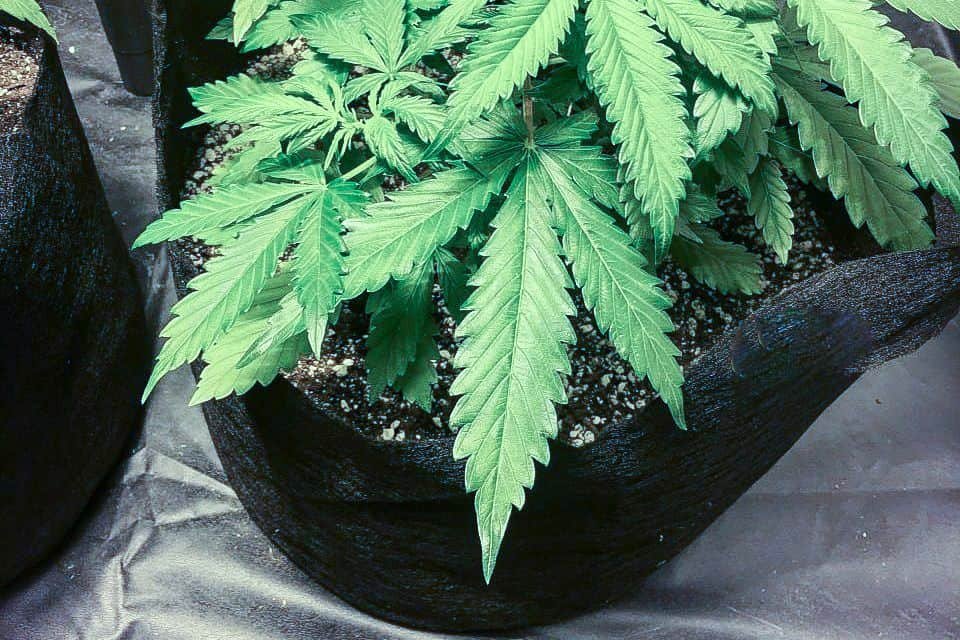
Once you have decided on the medium, it’s time to pick out your pots. Generally speaking, we always recommend going with fabric smart pots, for many of the same reasons we love coco-coir as the medium to fill them with.
Fabric pots are great for aeration and drainage, which helps ensure the root system has the best oxygenation and drainage levels possible.
Finally, make sure you select the right size pot for your plant. If you are going the photoperiodic route then this is less important to start out with, because you can transplant photoperiod plants without having to worry about shocking the plant. Their longer growth cycle means they have time to recover.
If you are going to grow autoflowering strains, we suggest planting them directly in the final pot size. The 12 liters (around 3 gallons) should be perfect as a final pot size for both autos and photos. We have an entire article on choosing the correct size smart pot.
Additional Gear
Apart from the main gear, there are a few other bits and pieces that you can add to your grow tent setup for maximum success. These include:
- Temperature and Humidity Gauges
- Ducting
- Power Strips
- Timers (this article covers the best timers for grow lights)
- Duct clips
- Adjustable Light Hangers
- Tape and Fasteners
- Humidifier or Dehumidifier (this article will help with humidifiers)
How To Setup A Grow Tent
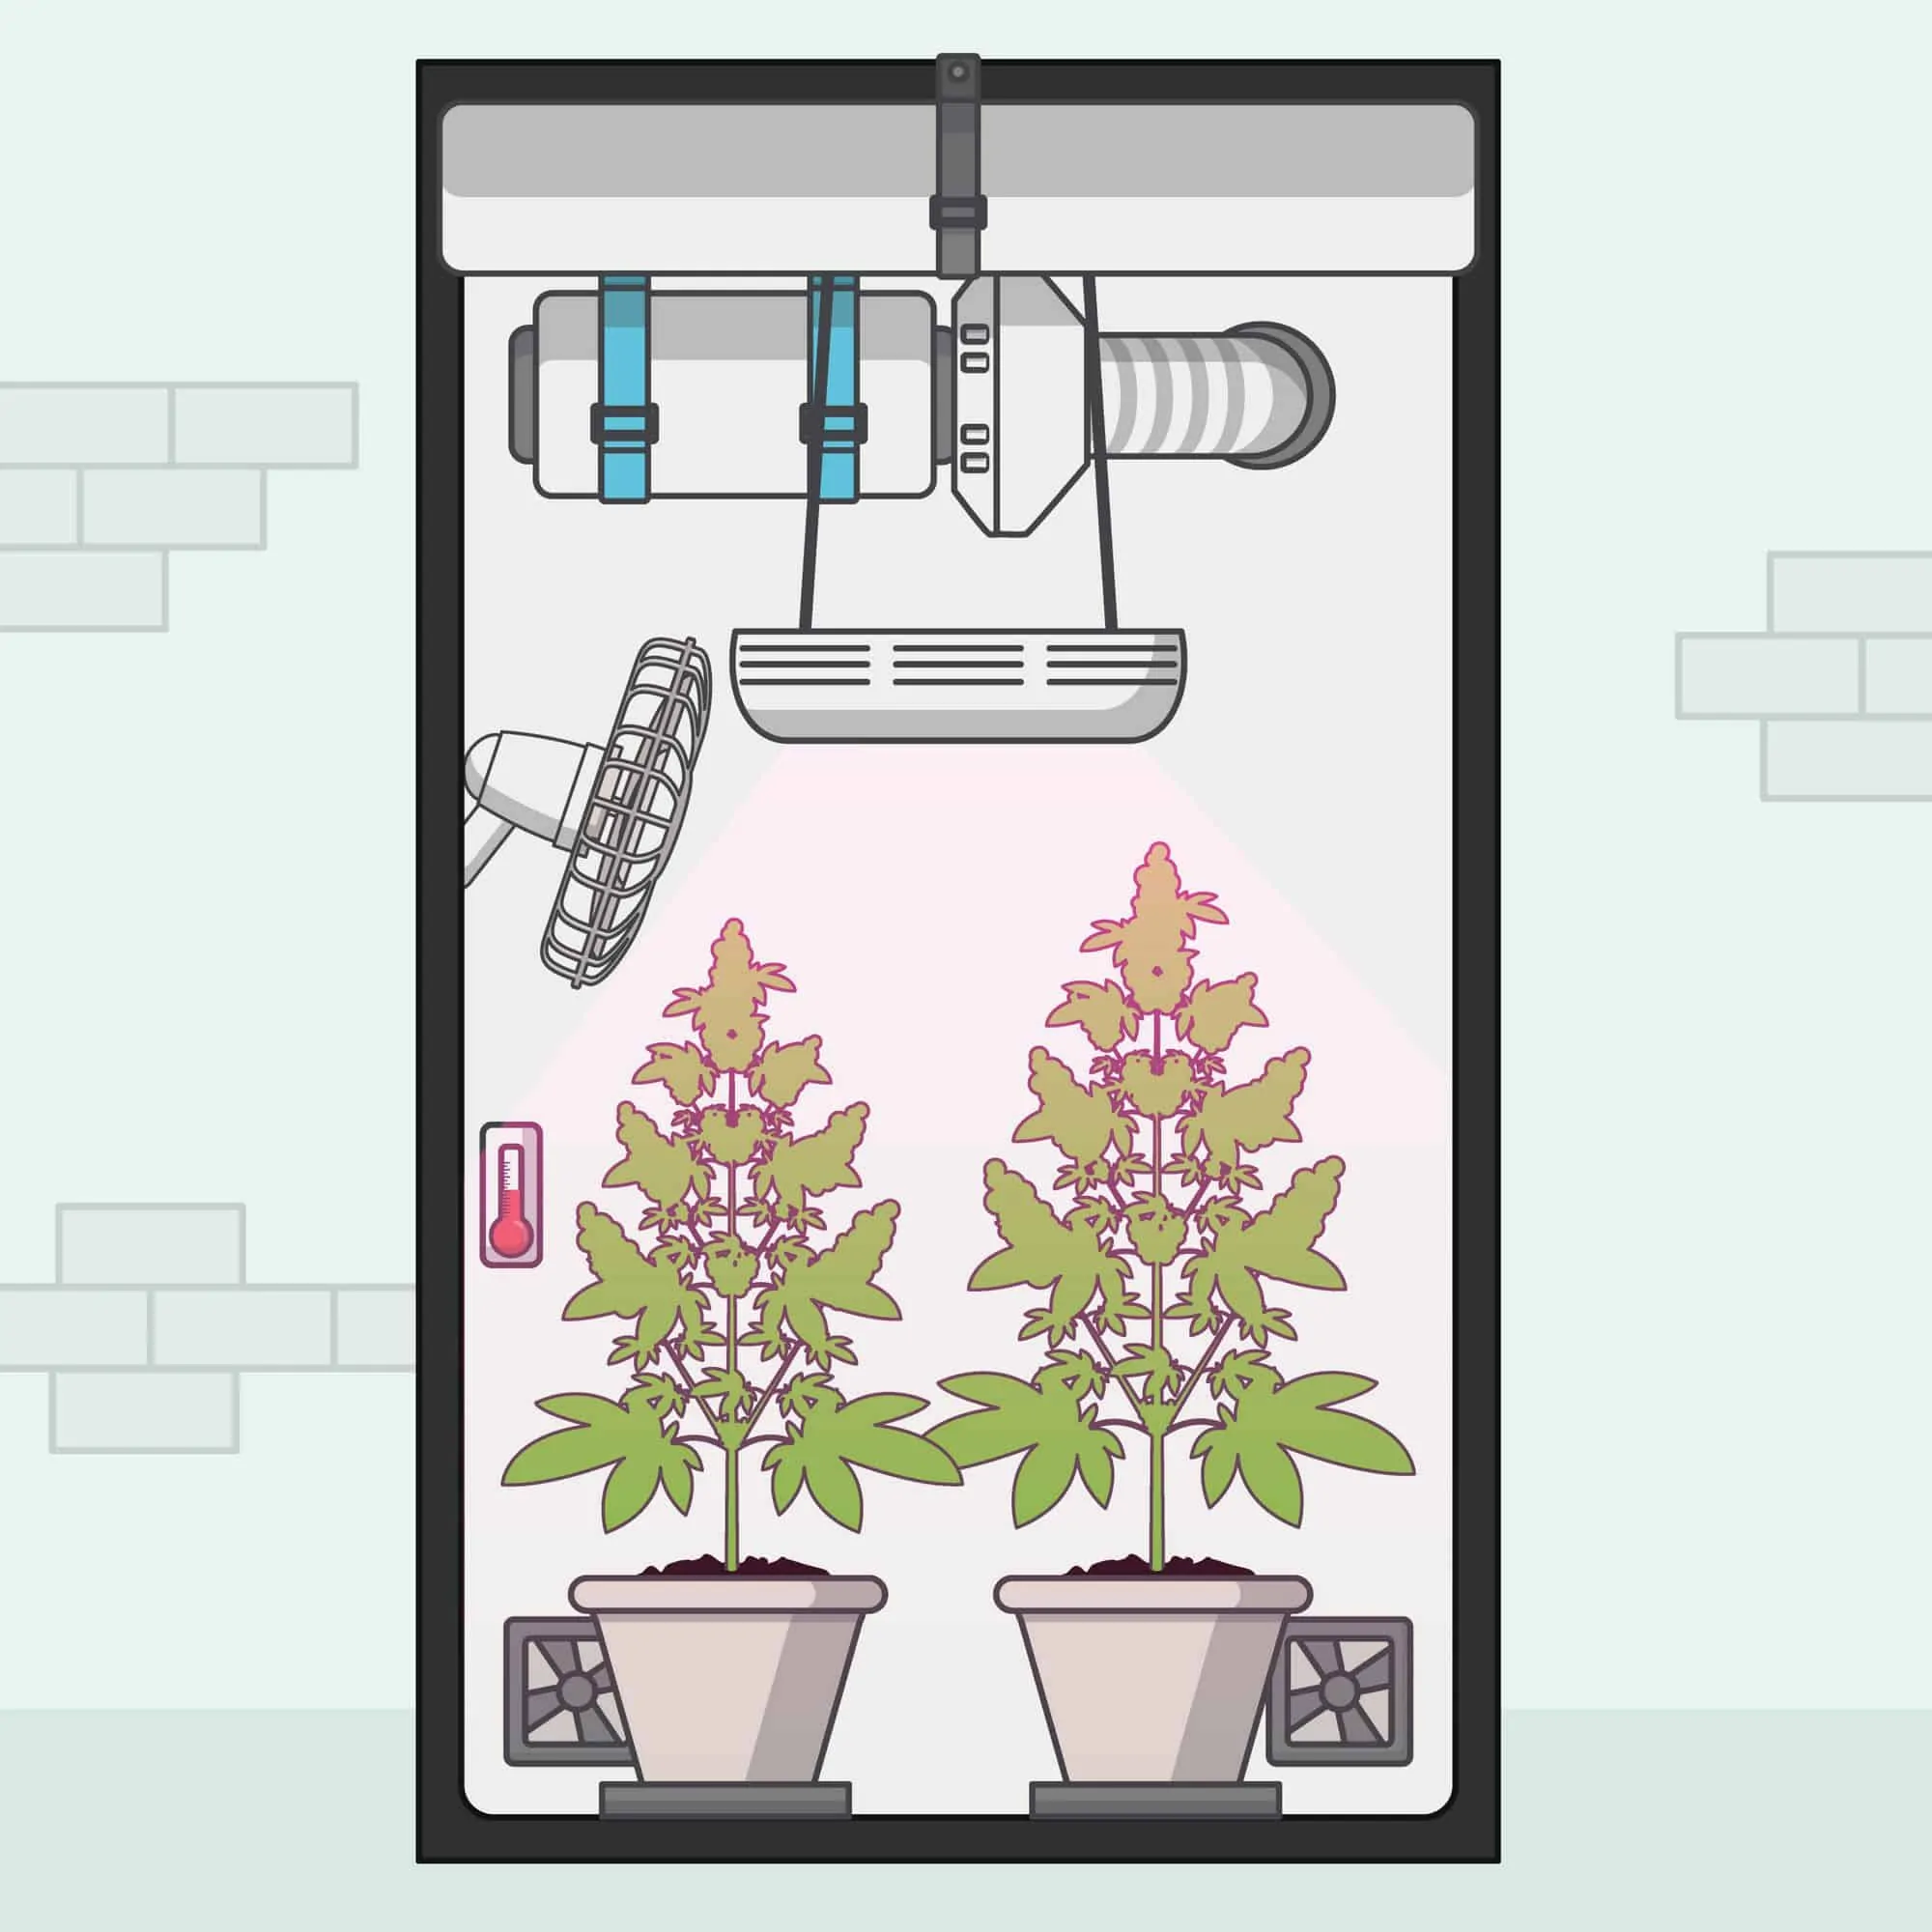
So now that we have gathered all the gear needed to get your grow tent up and running, it’s time to actually make it happen.
The first step is to make sure you have all the gear laid out and ready before you start setup. This will make the whole job much easier. Who wants to make their first grow any harder than it already is, right?
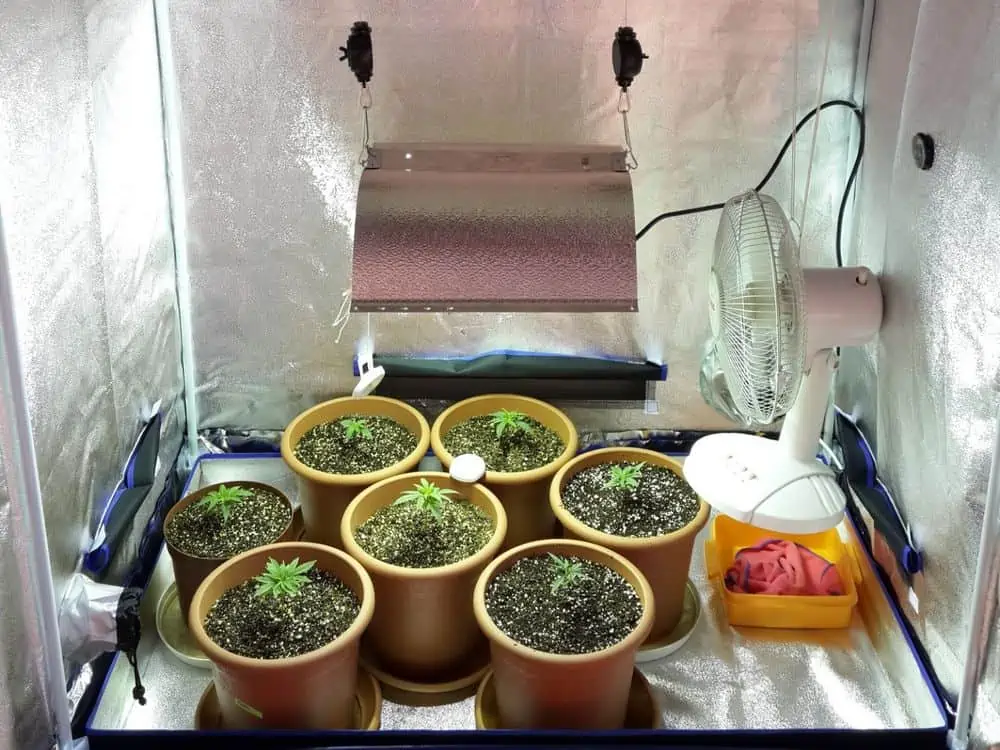
Step 1: Erect The Grow Tent
First things first. Let’s get that tent erected. Once you are set, it’s just a matter of following the instructions provided by the manufacturer and you should have the tent set up in no time.
The frame will be the first thing you need to work on. Once that’s all set up, you need to wrap the frame up in the canvas covering. Now, this can be pretty tricky, especially for one person. Its best to have another set of hands at the ready to help with this.
Now that your tent is ready, it’s time to get hanging! We’ll start with the light.
Step 2: Hang The Grow Light
Let’s get that light strung up. Attach the adjustable ratchet hangers to the top middle frame pole, and use the clips to hang the LED panel. The panel will come with instructions on the perfect distance to hang the light from the canopy, with each individual light having its own recommended setting. This article covers how to hang a grow light in a grow tent.
Step 3: Hang The Fan And Filter
Once the light is sorted, it’s time to attach your fan and carbon filter. Depending on the size of your tent and the type of fan you purchased,you will either hang it from the top pole or mount it in one of the corners.
You should always place the charcoal filter at the same height as, or higher than, your light. Use the ducting to connect this all together, and remember that the fan should be at the start of the ventilation loop.
You generally want to create a system where you have negative pressure inside the tent. Our article on negative pressure in grow tent environments explains why and how to do it.
Step 4: Add The Oscillating Fans
Next, get those oscillating and/or clip fans in place. These will help to keep your grow room aerated, as well as ensure optimal oxygenation levels throughout the canopy.
You do not connect these to the main ducting loop. They blow directly into the tent, not into any ducting.
Ideally, you want at least one fan blowing across the tops of your plants, and another blowing down below where the stems are.
Step 5: Add The Pots And Plants
Finally, it’s time to get your medium of choice in position. But only if you already have plants ready to go.
If you still need to germinate seeds, hold off on this step until your plants are ready to be transferred into your tent.
Once you are ready, fill up your fabric pots with coco-coir (or soil, if you are going down that route), and get those plants in. You’ll want to make sure you place the pots under the direct spread of the light.
Step 6: Set Up Extra Gear
Finally, get all those extras set up. Temperature and humidity gauges, power strips, timers, and duct clips are all going to help out a lot in ensuring successful cannabis cultivation and making sure the grow tent stays properly organized.
What About Additional C02?
Adding a C02 canister can boost production and potency. But this is an advanced technique. If you are just starting out, I highly recommended that you stick to the basics of cannabis cultivation and get a few successful grows over and done with, before you start worrying about more innovative and complicated methods.
Once you’re confident in your ability to maintain the perfect environment for optimal growth, then you can look into C02 injection.
Best Grow Tent Set Up: Final Thoughts
With that, you are all set! You have a fully functioning grow tent ready to house your cannabis plants as they grow. Just remember to keep a close eye on things, and make sure you are adjusting your environment where necessary, so that the plants have everything they need to flourish.
Mark says
New grower here ,this is without doubt the most informative post I have read ,very well done and thank you so much
Steven says
You’re welcome, I’m glad it helped!