 I love cooking with ingredients I grew myself!
And with an indoor garden, I can grow fresh ingredients all year round.
But some plants do better indoors than others.
Peppers are a great plant to grow indoors. The key is to give them enough light.
That is why you should be growing peppers indoors with grow lights. It is not possible to grow big, juicy peppers indoors with natural light alone.
Is it hard to set up an indoor grow room with grow lights?
Not at all! Keep reading for step by step instructions on growing peppers indoors. Just follow along and before you know it, you will be eating your very own homegrown peppers!
Contents
- 1 Growing Peppers Indoors With Grow Lights
- 2 How To Grow Peppers Indoors With Grow Lights: Final Thoughts
Growing Peppers Indoors With Grow Lights
We will begin with the materials you will need to grow peppers indoors successfully. Then we will go through the process of growing the peppers step by step. Follow along and you should be good to go!
Materials Needed
Depending on how many plants you intend to grow, you will have to modify this list to account for the number of plants.
Containers
The first thing you will need are containers in which to put the soil and the plants. Let’s look at the type of containers you want to grow peppers.
Container Size
Peppers have a large root system which means you cannot get away with a small, shallow pot or container. You will need a substantial container for each pepper plant.
You will need to get containers with at least a 12″ diameter. A depth of 14 to 24 inches is sufficient, with 14 inches being the minimum depth. Deeper is better, but sometimes space constraints and budget restrictions get in the way.
Container Material
Surprisingly, plastic or metal pots are better for peppers than terra cotta. It seems counterintuitive, because terra cotta is natural and more expensive.
Peppers need moist soil consistently. The problem with clay or terra cotta pots is that they tend to dry very quickly and can deny the roots the water they need. Metal or plastic pots do not absorb water at all and leave the soil and roots to do all the absorbing, which is ideal for peppers.
Drainage Or No Drainage?
Yes, drainage! You will need containers with some type of drainage. Although peppers need consistently moist soil, too much water on the roots for too long can cause mold and other issues like root rot. This is a bad deal, so be careful not to overwater.
Make sure your pots have some small holes and a tray underneath them for drainage. If your pots do not have holes, you can easily drill some without too much fuss.
Container Spacing
We also sort of included this is in the how-to section below, but since it pertains to containers, we will cover it here too. You should make sure your pots are about 12″ apart, if you are setting up multiple containers in your indoor grow room.
You can adjust the spacing as needed. if your pepper plants become very bushy, you may need to move them a couple of extra inches apart.
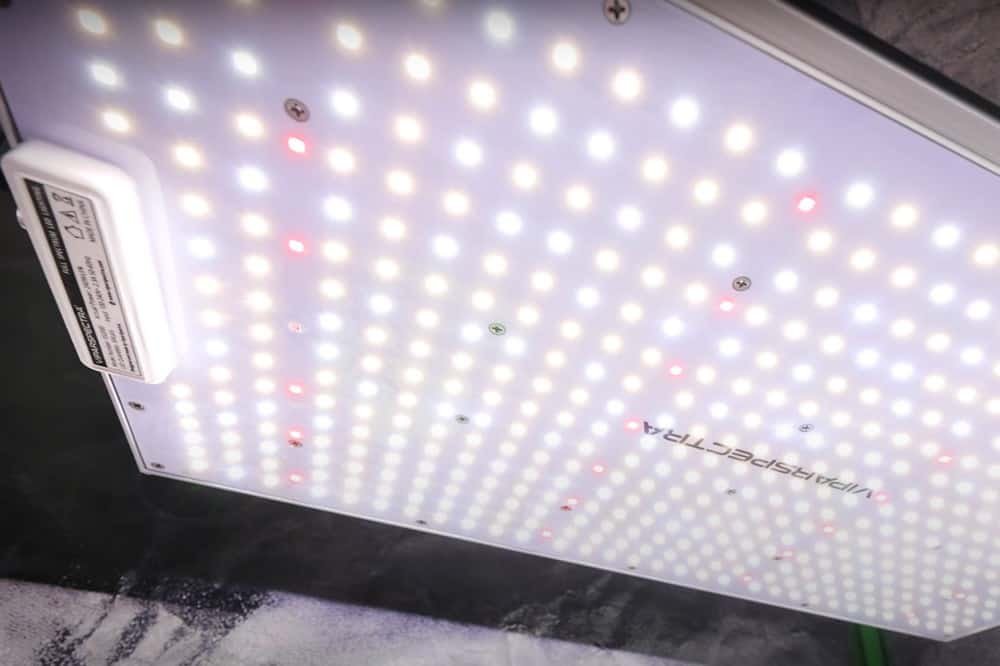
Light Fixtures

Peppers prefer full sun. However, that is not an option when growing indoors. If you have access to a west-facing window in your house, that is ideal. Getting as much sunlight into the room as possible is a good starting point and will cut down on your lighting bill.
Because you will need grow lights to grow peppers indoors. The more natural light the plants get, the less you need to spend on grow lights. But you will have to spend something. The question is how many, and what kind of, lights do you need?
Fluorescent Vs LED
Here we go. If you visit any online forums or social media groups about growing peppers indoors, you have no doubt seen these long threads about LED grow lights vs fluorescent lights.
On the one side, you have the fluorescent people saying they are cheaper and have worked great for years. They are less hassle and easier to get started with.
On the other side, you have the LED people who argue that the bigger LED fixtures (compared to the smaller cheaper ones) will cover more surface area with a stronger light. They argue that the extra cost is worth it, because the overall light output is superior.
The truth is that both sides are correct. They both make valid points and both types of light fixtures will work to grow your peppers.
Fluorescent tube fixtures have long been used to grow plants indoors and they work just fine. They burn fairly cool and are not too expensive to replace.
LEDs are a bit more expensive, but they indeed produce more light and they also burn cooler, when you take the output into account. It is up to you which way to go.
We recommend LED grow lights, unless you only have a single plant (even then, LED is better, but it is not as clear cut). Peppers like quite a bit of light. If you go with LED fixtures, you will need far fewer of them than fluorescent ones.
Yes, each one costs more, but they last longer and are cheaper to run. If you’re not sure which ones to get, these are our recommended LED grow lights. If you decide to go with flourescent fixtures, we love the ones from Hydrofarm.
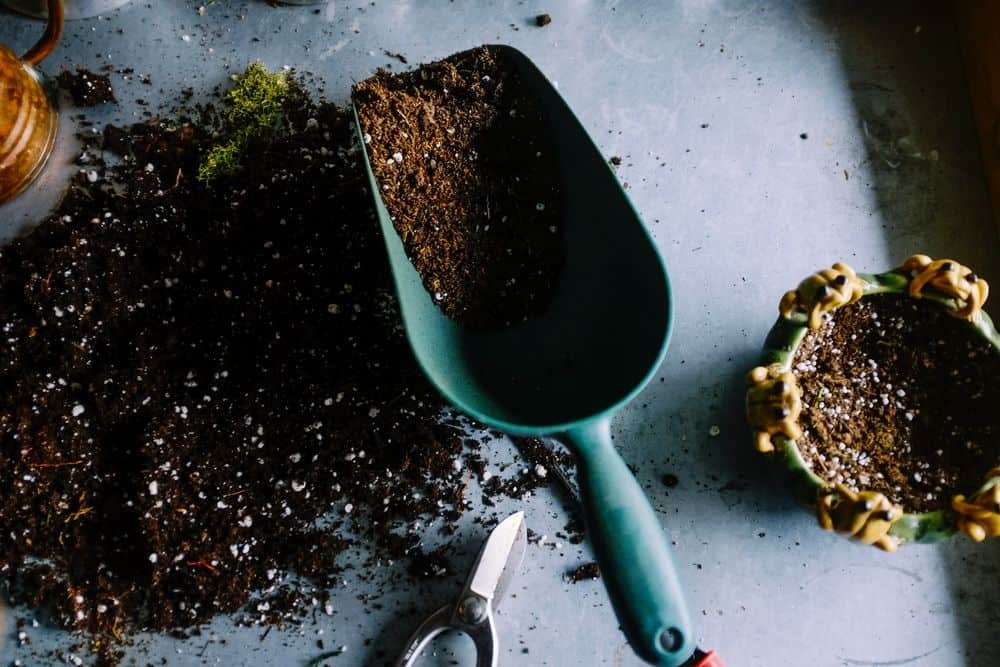
Potting Soil
Peppers like loamy soil and will be much happier if you can provide loamy-rich soil. Fill each pot in which you intend to grow a pepper plant to within about 4 or 5 inches of the rim.
In terms of how much soil you need, you will have to do the calculation, depending on how many containers you are filling. A rough estimate is sufficient. If you get to much soil, you will always be able to use it later. Some potting soil comes in quite large bags, so you would only need a few of those.
You can use almost any kind of gardening soil. Just keep in mind that if you get soil that is not very loamy, you will need to modify the soil with some compost, or other organic matter, to make it loamier.
Timers And Power Strips
This may not be necessary if you are only growing a few plants. However, if you are setting up several pots in a large room, you will want light timers and power strips or surge protectors to make things easier on yourself.
Heating Pads
This depends on the temperature of your house and your grow room. You may choose to get some heating pads to keep your plants warm, without having to crank up the heater and heat the whole house. A small space heater or two can also do the trick, if needed.
Fans
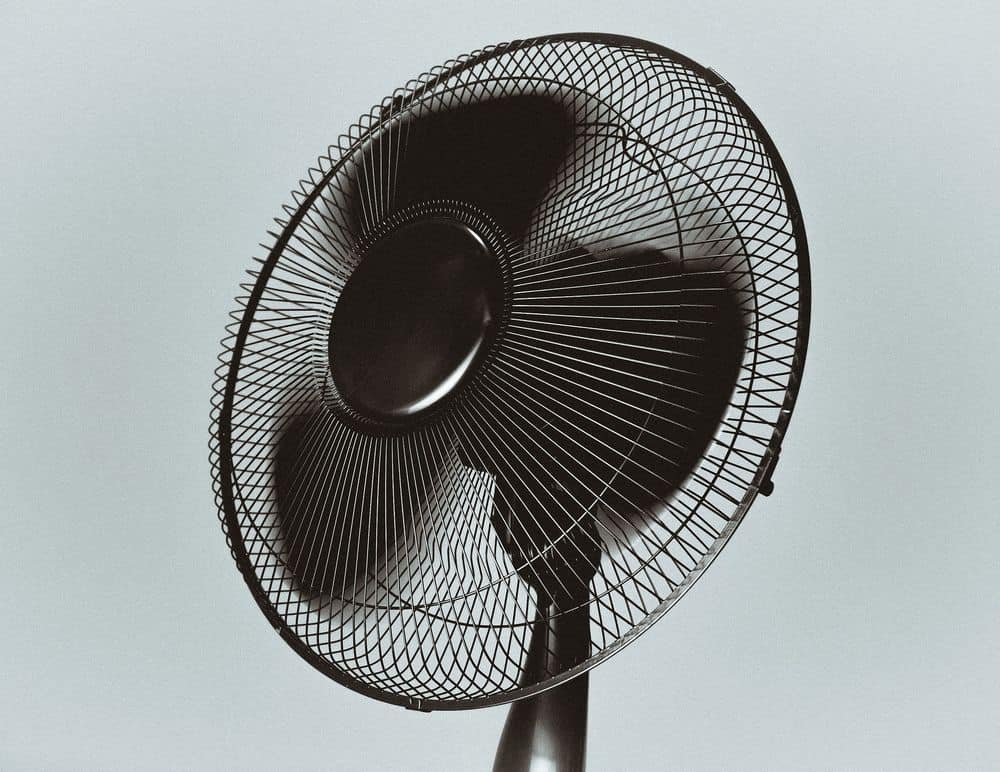
Keeping the air moving is important in any indoor grow room, even for peppers. A couple of floor fans or oscillating fans set on slow will do the job nicely. You could open a window periodically, to let in some fresh air as well.
Pepper Seeds
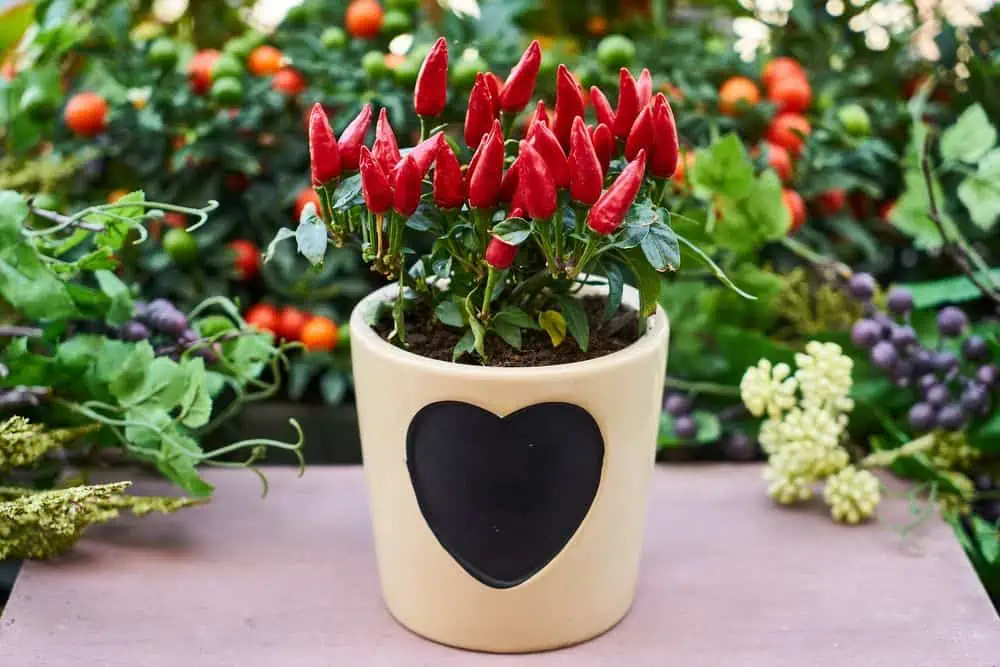
Smaller varieties of peppers do better indoors, so when you are purchasing your seeds, try to lean toward smaller peppers. You can also grow large peppers indoors, but they are just a little more difficult. The following are all good peppers to grow indoors.
- Thai peppers
- Chiltepins
- Sequins
- Habaneros
- Poblanos
- Jalapenos
Starter Mix And Starter Trays
Purchase some starter mix soil for when you plant the seeds. This soil will be fluffier and will not have many nutrients. It is important to give seedlings plenty of air and too many nutrients can harm them.
Starter trays are inexpensive and you can buy them at the local home improvement store or landscaping supply store. Or online. Starter mix and seedling trays will make your job of getting to the seedling stage much easier.
Step 1: Set Up Your Grow Space
The first step in growing peppers indoors is to get your grow area set up and ready to go.
Place Your Pots
Set up your pots in your grow room. Lay some towels or old blankets under your pots to soak up any accidental spills or water that seeps out of the pots. Leave about 12″ of space between your containers to allow for the growth of your plants as they get bigger.
Set Up Fans And Heaters
Set up your fans and heating pads or small space heaters. You can set the fans up at the end of your container rows, and your heaters on the other side, opposite the fans. Heaters are not necessary, if your house never gets too cold, but if you live in a cold place, you must keep your peppers warm.
Natural Light
Try to incorporate natural light into your setup if possible. Any window will be beneficial, but a west-facing window can work wonders for your peppers.
If you have a window, try to set your plants up as close to the window as possible. However, if you get cold air coming in, then you may want to be conservative with how close you get to the window.
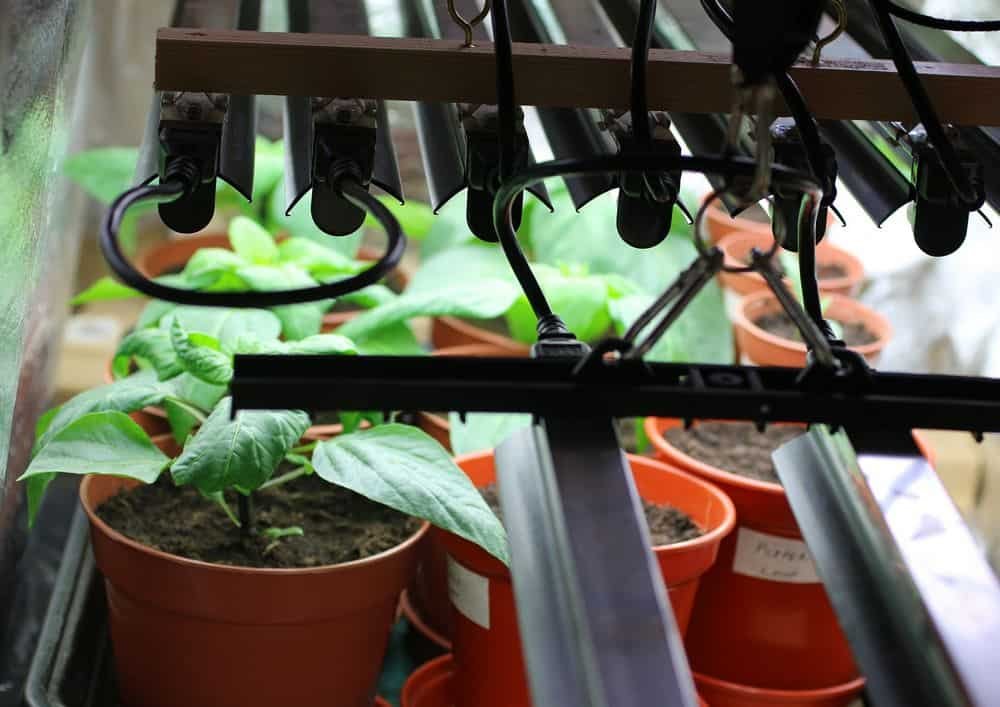
Step 2: Set Up Your Grow Lights
Hang your grow lights from the ceiling using chains and hooks. It is always safer to hang them from studs. If you cannot hang from studs, some screws come with special anchors that will hold a fair amount of weight without the need to be in a wooden stud. Check the manual for the fixture to see if it is OK to hang from an anchor instead of a stud.
If you are using a grow tent, hang the light fixtures from the crossbars below the ceiling of the tent. The tent instructions will tell you where and how to hang grow lights in your tent. We also have an article explaining how to hang grow lights in a tent.
If you have large fixtures, you can space them so one fixture covers 2 to 3 pots. If your fixtures are small you may want to have one light fixture per pot. You want to try to give each plant as much light as possible, without overheating them.
Seedlings Vs Bigger Plants
You will need to raise your lights higher as the pepper plants grow. When you have seedlings, keep your lights very close, about 4 inches away (assuming you are using LED or fluorescent tube lights and not heat-burning lights like incandescent bulbs).
As the peppers grow, raise the lights up so that they are never closer than about 6 inches. Since I don’t know exactly what kind of fixtures you have, follow this tip.
Look at the light radius, if it is hitting all of your plant plus a few inches all around and not getting the plant too hot, it is the right height. The idea is to bathe the entire pepper plant in light, while leaving some air space above the plant canopy as well.
Hold your hand at the closest point of the plant to the light, with the back of your hand facing the light. Leave it there for about 30 seconds. If your hand gets too hot, the plants will also get too hot. Hang the lights higher.
Step 3: Fill Your Pots
Fill your pots with potting soil. Again, be sure to get loamy soil. If you are unable to get loamy soil, or if your soil is not as loamy as you would like, you can add compost, dried leaves, or other organic material and mix it in with your potting soil.
Fill your pots up with soil. Leave some space on top, as mentioned above (4-5 inches). Do not pack your soil. Just fill it and leave it naturally loose. It will compact over time on its own.
Step 4: Plant Your Seeds
You may have chosen to purchase seedlings and transplant them, instead of growing from seeds. But here, I will cover growing from seeds, since that is the most economical option. You can skip this step if you have seedlings.
- Get your starter trays and soil all set up by filling the starter trays with the starter mix and softly compressing the soil with your fingertips.
- Plant your seeds about twice as deep as the width of the seed. This usually ends up being between ¼ and ½ inch.
- You want to keep your seeds at a temperature of about 80 degrees Fahrenheit during germination. This is where heating pads come in very handy. Another option is a space heater or a heating light near the starter trays.
- Do not overwater seeds. You only need to keep them moist by giving them some water every 2 days or so, depending on how dry the soil gets.
Step 5: Transplant Your Seedlings

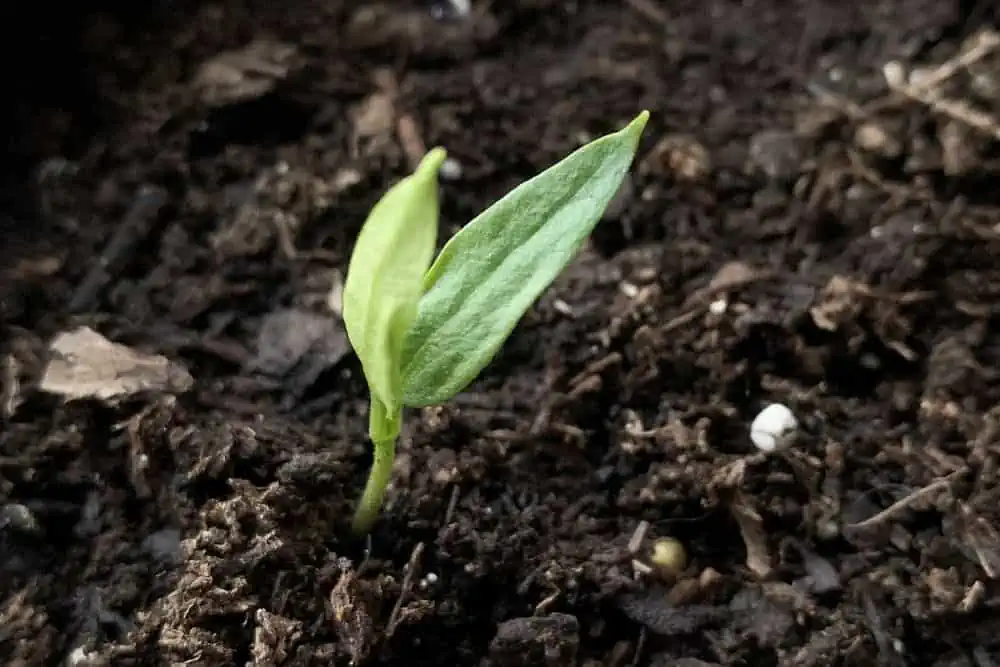
When the seedlings reach about 2 inches tall, it is time to move them into the big pots and let them grow to mature pepper plants. If you purchased seedlings, follow this same procedure.
- Water the seedlings before moving them, so that the root ball does not fall apart and lose all the soil it has contained.
- Pre-moisten the soil in the destination pots, so that it is nice and moist, but not sopping wet.
- Dig a small hole at the top of the destination pot about an inch wider and half an inch deeper than the root ball.
- Place the root ball into the hole and gently fill in the void with soil. Press gently near the base of the seedling to keep it in place. Do not press too hard. Just use barely enough pressure to keep it still.
Step 6: Water Your Plants Regularly
You will want to let the soil dry some, but not get sandy or completely arid. The rule of thumb is to water your pepper plants every 2 or 3 days, unless it is very hot and dry in your area. In that case, it may be necessary to water them every day. Just make sure they have drainage, and you will be good to go.
Step 7: Keep An Eye On The Temperature
Pepper plants like to be between 70 and 80 degrees Fahrenheit, which is almost ideal, because most indoor spaces are already somewhere in that range. Peppers can tolerate a bit more heat than some other plants, but you will want to keep them between 70 and 80 degrees in general.
Peppers do not like to be too cold. If you see your temperature getting much below 60 degrees Fahrenheit, you want to get some heat on them. They can survive at 60 for a bit, but if they drop below 50, it could shock them.
Ideally, you should never let the temperature drop below 70 degrees. This is why we suggested some space heaters or heating mats, if you live in a cold area.
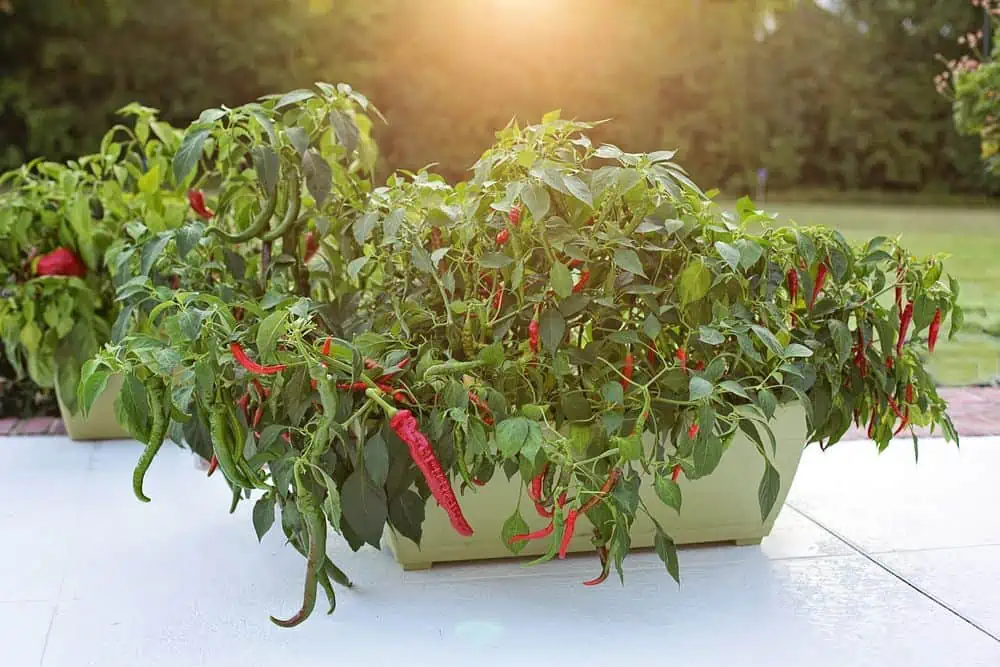
Step 8: Harvesting The Peppers
When you notice your peppers going through a color-changing process, you know the time to pick them is close. You can see when peppers are ready. They have a certain shine to them and they start to look delicious. When your peppers look ready, they are ready!
How To Grow Peppers Indoors With Grow Lights: Final Thoughts
Growing peppers indoors with grow lights is far easier than you might have thought, if you follow the simple step-by-step instructions above.
If you’re thinking of growing peppers without grow lights, you will have a harder time. You can grow them, but they are unlikely to yield much of a harvest under natural light only. They need a lot of light in order to grow a good number of full-sized peppers.
Leave a Reply