 Anyone can use a grow light.
But not everyone uses them correctly.
Knowing how to use grow lights correctly can save you a good amount of money.
It also helps your plants grow faster and stronger.
So how do you use grow lights for indoor plants the right way?
Keep reading to find out. We’ve got a simple step-by-step guide to ensure you use your grow lights correctly and give your plants the best possible chance to thrive.
How To Use Grow Lights For Indoor Plants
Using most grow lights is simply a matter of plugging them in and turning them on. But using them correctly takes a bit more effort and ensures your plants grow faster and yield more. Follow these steps to make sure you use your grow lights the right way.
Step 1: Assess Your Grow Space And Plants
The quest to use your grow lights correctly begins before you have even purchased them. The first step is to make sure you have a solid understanding of the lighting needs of your grow space and the plants you intend to grow.
How big is the grow space? How many plants are you looking to grow? How much light will those plants require?
By assessing your grow space and understanding the specific needs of your plants, you will be better placed to choose the right grow lights and determine the optimal setup for your grow lights. This will help create an ideal environment for your plants to thrive and achieve their full growth potential.
Step 2: Install Grow Lights
Once you get your new lights home and are itching to get them up and running, take a moment to glance over the installation guide before you rush in.
Once you have a solid mental picture of how you want to set your lights up, you can then clean and clear the space and get everything ready to start the build.
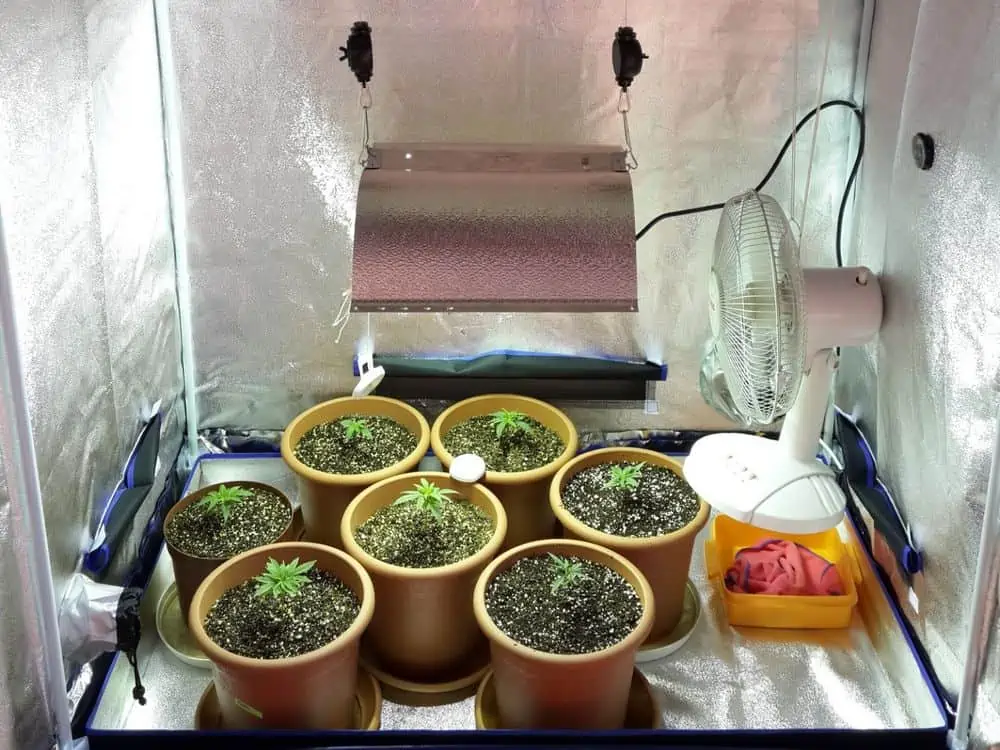
Pay extra attention to the mounting options available for your specific grow light system. These may include hanging kits, brackets, or adjustable hooks.
You will want to set up your tent and lights in a way that allows for easy adjustment of the grow lights’ height as your plants grow. Ensure you set your grow lights up at the correct height initially, so that they will evenly cover your entire canopy.
Also, ensure you have good access to the power supply in a safe manner. Once set, turn the fixtures on and check the light distribution.
Step 3: Adjust Light Intensity And Spectrum
Now that your grow lights are installed, it’s time to focus on adjusting the light intensity and spectrum to meet the specific needs of your soon-to-be-flourishing plants. Providing too much or too little light intensity is one of the most common cannabis growing problems.
You will want to make adjustments to your grow light settings to ensure they emit the correct light intensity and spectrum for the type of plants you are growing.
Different plants have varying light requirements, so it’s important to find the ideal balance. Adjusting the height of your grow lights is one way to control the light intensity reaching your plants.
If the light is too intense, raise the lights higher above the plants, and if they are not intense enough, you can lower them. Another option is to get dimmable grow lights.
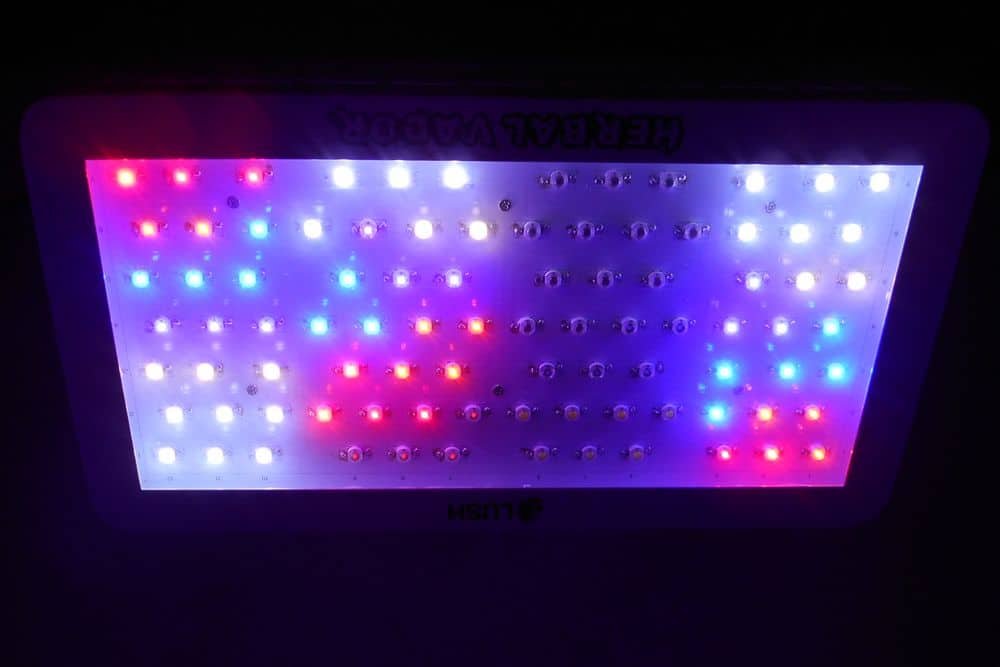
Many grow lights offer adjustable spectrums, allowing you to customize the light wavelengths emitted. For vegetative growth, use a spectrum with higher blue light, and for flowering or fruiting stages, more red light is preferred. Or you can opt for an all-round, full-spectrum setting if you don’t have the color options on your model.
Step 4: Set Up Light Timer And Schedule
A consistent light schedule is important for plants to grow healthy, and the next step is to set up a light schedule and a timing device for your lights.
Cannabis plants require around 16 to 20 hours of light per day for vegetative growth, while flowering weed plants need a 12/12 light schedule. If you are growing a different type of plant, you should look into the needs of the plants you intend to grow. We also have an article specifically discussing how to use LED grow lights for succulents here.
Set the grow light timer according to the recommended light duration for your plants. Program the timer to turn the grow lights on and off at the desired times, and check to make sure it is working as intended.
Some plants, especially those that require long nights for flowering, may need uninterrupted darkness during their dark period. Adjust the timer accordingly to provide the necessary dark period for these plants. And make sure other light sources cannot get inside the grow space.
By setting up a light timer and schedule, you can provide your plants with a consistent and reliable lighting routine. But you should also investigate whether your plants will have different light requirements as they move from one stage of growth to the next, and adjust accordingly during the growing cycle.
Step 5: Maximize Efficiency And Energy Conservation

Maximizing efficiency and conserving energy when using grow lights is not only beneficial for your plants and the environment but will also help you save on electricity costs over time.
Aside from correctly setting the light intensity and timers, you can also use reflective materials or surfaces to enhance light distribution and reduce the need for additional lights.
Reflective walls, trays, or grow tents can bounce light back onto your plants, maximizing the effectiveness of your grow lights and reducing the number of lights needed. This is a great way to reduce the electricity consumption of a cannabis grow.
Also, regularly monitor the temperature in your growing area and check for excessive heat. Too much heat can not only harm your plants, but will also shorten the lifespan of your grow lights. You should also conduct regular maintenance and cleaning to keep your grow lights operating efficiently.
Step 6: Monitor And Maintain Grow Lights
Dust and dirt buildup can reduce light output, so regularly ensure the lights and reflectors are clean. Additionally, keep an eye on any signs of wear or malfunction and address them promptly to prevent energy waste.
We have an entire article detailing the best way to clean LED grow lights. The method is the same for other types of grow lights, too. Here is a brief summary of what to do to clean and perform maintenance on your grow lights.
Use a soft cloth or a gentle brush to wipe away any dirt or dust, but be careful to avoid using harsh chemicals that may damage the light fixtures.
As you are giving them a wipe down, also pay attention to the condition of the bulbs or diodes. If you notice any flickering, dimming, or discoloration, it’s a sign that the bulbs may need replacing.
Follow the manufacturer’s guidelines for the recommended lifespan of the bulbs and replace them as necessary to maintain optimal light output.
Periodically, also inspect the electrical connections and wiring to ensure they are secure and free from any damage. Loose connections can cause electrical hazards or interruptions in the light supply and can lead to damage to more than just your plants. If you notice any issues but are not confident in fixing them yourself, consult a qualified electrician for professional assistance.
How To Use Plant Grow Lights: Final Thoughts
Using grow lights is easy. Using them correctly is not much harder, if you know how to use grow lights for indoor plants the right way. And now that you’ve ready this article, you know how to do just that.
It really is just a matter of assessing the needs of your plants and then providing them exactly the type of light and the amount of light that they need. This means buying the right lights, hanging them at the right height, putting them on a timer and setting the correct lighting schedule, adjusting everything as needed, and monitoring, maintaining, and cleaning the lights regularly.
Ian brown says
Hi
I’m thinking of buying the LUMii black blade 200w which is dimmable. My question is how much i should dim the light during the veg stage? I was told to run the light at 25% until bloom, which needs 100%. Is that correct?
Grow room size is 8’ x 2’ so I will hang 2 lights.
Regards
Ian
Steven says
I would probably start around 50% and adjust from there, based on how your plants respond.